You have a material you did not process before with the BRM laser machine. How do you find the correct parameters to get a good result?
Is my material suitable for the BRM laser?
Before you can start processing material with the BRM laser machine, you need to check whether the material is suitable for processing with a laser beam. Not all materials are qualified for processing. There are materials that can cause damage to the machine and to persons working with the machine who are in the same room. When you process a material such as PVC with a laser, harmful gases are released that cause the machine to rust. Moreover, the generated gases are carcinogenic. That is why you do not want to use the laser machine to process such materials.
Materials that contain a negatively charged particle (anion) must never be processed with the machine. Here are some examples. Materials containing the elements listed below, cannot be processed with the BRM laser:
- Fluoride F-
- Chloride Cl-
- Bromide Br-
- Iodide I-
If you are unsure whether your material contains one of these elements or another anion, you can request the MSDS (Material Safety Data Sheet) from your material supplier. It states what a material is made of.
If you are not sure how to read an MSDS, please check this article: How to read an MSDS?
 |
PLEASE NOTE!!! Anions and Chloride are very hazardous to one's health. BRM Lasers strongly recommends not to work with PVC or other materials containing Anions / Chloride with a laser machine. Processing these materials will terminate the warranty on your machine. |
Reflective materials
Reflective materials are also not suitable for cutting. Think of metals, for example. Not all of these materials are reflective for humans, but they are for the machine. These materials are reflective at the wavelength of the laser beam. You also cannot cut glass with the BRM laser machine.
However, some of these materials, like glass, are suitable for marking with the addition of a laser spray.
This also applies to anodized aluminum.
What is the difference between marking and engraving?
When engraving a material, you remove material with the laser beam. That is what you do with, for example, wood and acrylic.
Marking can be done by heating the material and also by applying something to it, such as a laser spray. That is what you do with stainless steel, for instance. You spray a layer of laser spray on stainless steel, after which you can mark over it with the laser.
Both options – marking and engraving – are named [Scan] or [Fill] in the software.


My material is suitable for processing with the laser machine, how do I find the right parameters?
To find the correct parameters for your material, we have to make a distinction between cutting and engraving / marking. We also have to make a difference between materials such as plastic and wood.
How do I find good parameters for cutting a plastic?
It is wise to use a small shape. You can then test several settings, and you will not lose a lot of material. A square of 5 × 5 cm is a good example. Choose a low speed with high power. A speed of 5 mm/s and 85 % power are good starting points. You will see that you can cut through your material but that the result can be improved.
If you notice a lot of melting, a deposit and/or leak marks, the material is heating up too much. Are the edges reasonably clean, without white deposit and leakage traces? Then you are already in the right direction in terms of speed.
If you don't have a clean edge yet, you can take your speed up a notch. You want to keep the power on the high side. So when you have a melt, a deposit or leak marks, you will initially increase the speed a little.
Not until the speed is so high that the corners do not turn out well, do you adjust the power. You then go back to the speed at which the corners are crisp. After that, you reduce the power in small steps.
When a white deposit appears on the cutting edge you can also reduce the air supply. Make sure you keep using air, and never turn off the air supply. Please also make sure that no flame is caused. Should that happen, you will have to add a little more air.
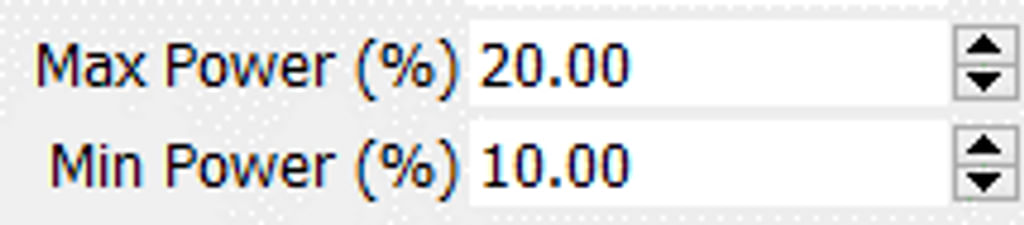
You can also set the min and max power. The min power is the power used for the corners and curves. If you see that the edges are turning out nicely but the corners are getting very dark, you can lower the min power. Lower the min power until the corners are also turning out fine. If you set the min power too low your product may be stuck somewhere in the corners. If this is the case, increase the min power slightly. There can be quite a difference between the min and the max power.

How do I find good parameters for engraving a plastic?
Firstly, it is smart to use small shapes to avoid losing too much material. Consider a square of 5 × 5 cm, for example. If you want to engrave a picture, you can select a part of it to test. Do not scale the picture as this will give a different result.
When engraving / marking, 3 elements are important.
Note that intervals are not used when cutting material, they are only used for engraving / marking. The interval is the horizontal distance between the engraving lines. You can adjust it to bring the lines closer or further apart. Engraving is faster when the interval is higher. There will be more distance between the engraving lines and as a result, fewer lines will be engraved. However, you do lose some detail. We recommend keeping the interval between 0.06 and 0.12.


To get the desired parameters, you can start with a speed of 400 mm/s. Engraving at a higher speed can result in the loss of small details. Choose a low power level, for example, 20 %. From here, you can either reduce or increase the power. Make sure that you do not reduce the power below about 15 %, as there is a risk that the laser will not be activated. If the situation requires less power, try it and otherwise increase the speed slightly.
When it comes to engraving / marking, it is somewhat more difficult to define when an engraving / marking is of quality. When it comes to engraving, much depends on taste. You might like a light engraving. However, you may also prefer a deeper engraving.
Detail is often more important when engraving a picture than when engraving a serial number, for example. That is why you might want to use a different interval when you engrave a picture than when you choose to engrave a serial number in the same material.
Use less power if your engraving is too deep. If the engraving is not deep enough, use more power.
If you are losing detail, you can either adjust the interval or start engraving slower. If you see overlap in the engraving, you can increase the interval to eliminate that. In any case, do not use too much air but be sure to always have at least some air.
How do I find good parameters for cutting wood?
Firstly, it is smart to use small shapes to avoid losing too much material. You can then test several settings, and you will not lose a lot of material. Consider a square of 5 × 5 cm, for example. Choose a low speed with high power. A speed of 5 mm/s and 85 % power are good starting points. You will see that you can cut through your material but that the result can be improved.
If you cut too slowly, a flame will appear. When this happens, you will have to cut faster.
Not until you get to a speed where the corners don't turn out well, do you adjust the power. You then go back to the speed at which the corners are crisp. After that, you reduce the power in small steps.
If you have cut your wood and the entire edge of your product is charred, the first thing you do is increase the speed. Only until your corners don't turn out well, do you decrease your power. Then the edges will become cleaner and less dark.
If a rim of dust appears on the top of your material, you should turn down the air supply. Basically, with wood, you can open up the air supply completely. Not until you get a rim of dust do you reduce the air slightly.
You can also set the min and max power. The min power is the power used for the corners and curves. If you see that the edges are turning out nicely but the corners are getting very dark, you can lower the min power. Lower the min power until the corners are also turning out fine. If you set the min power too low your product may be stuck somewhere in the corners. If this is the case, increase the min power slightly. There can be quite a difference between the min and the max power.
How do I find good parameters for engraving wood?
Firstly, it is smart to use small shapes to avoid losing too much material. Consider a square of 5 × 5 cm, for example. If you want to engrave a picture, you can select a part of it to test. Do not scale the picture as this will give a different result.
When engraving / marking, 3 elements are important.
Note that intervals are not used when cutting material, they are only used for engraving / marking. The interval is the horizontal distance between the engraving lines. You can adjust it to bring the lines closer or further apart. Engraving is faster when the interval is higher. There will be more distance between the engraving lines and as a result, fewer lines will be engraved. However, you do lose some detail. We recommend keeping the interval between 0.06 and 0.12. To get the desired parameters, you can start with a speed of 400 mm/s. Engraving at a higher speed can result in the loss of small details. Choose a low power level, for example, 20 %.
The smoke released during engraving quickly gets into the pores of the engraving. Use less air to reduce the deposits. Always keep using some air. Otherwise the smoke will clog up the lens and break it. Check the lens regularly if you decide to add little air.
Deposits are a common phenomenon with wood. The smoke released during engraving quickly gets into the pores of the engraving. Use less air to reduce the deposits. Always keep using some air. Otherwise, the smoke will clog up the lens and break it. Check the lens regularly if you decide to add little air. Alternatively, you can apply a thin layer of masking tape to your wood and then engrave it. That will reduce the deposit. However, you will have to adjust your parameters slightly because you are engraving through an extra layer. Afterwards remove the tape and you will see that you have better contrast than when you engrave without the layer of tape.
Engraving a mirror
With the BRM laser machine, you can also engrave a mirror. On the back of a mirror there is a thin layer. You can engrave this layer away. Never press the Pulse button when engraving a mirror! This will break the mirror!
Start here with a speed of 400 mm/s. If you engrave faster you can lose some details. Because the layer on the mirror is thin you use little power. Start for example with a power of 20%. You can always add a little more power. However, you can also engrave slower with little power.
Engraving / marking glass
It's also possible to engrave / mark glass. You can use a laser spray to add contrast.
Please note that when engraving / marking glass, it is important never to press the Pulse button. Pressing the Pulse button will break the glass. The glass wants to expand due to the sudden heat, but this is impossible. It will cause the glass to break.
When engraving / marking glass, start with a speed of, for example, 400 mm/s at 20 % power. If required, you can add some more power.
For a good result, you can cover your glass object with a wet newspaper. Wet paper cools the glass. It ensures that the deposit will not get on your engraving. One layer of paper is enough. However, you will need to use a little more power because you will also need to engrave / mark through the layer of paper. If you engrave / mark a large area, you can spray the paper layer with water every now and then.
With the BRM laser machine, you can also mark metal. However, you'll need to use a laser spray to do so. The laser spray ensures that the material no longer reflects. The laser spray also has a color, which gives your marking that same color and provides a contrast to the underlying material.
Without adding laser spray you cannot mark metals! The laser beam reflects back to the laser source and causes it to break! If you do mark metals without a laser spray and the laser source is damaged, this is not covered by warranty!
Start with a speed of 400 mm/s and a power of 20 %. From here you can increase your power slightly to achieve a pleasing result. After marking, you can wash the spray off your material with lukewarm water and what remains is the grey-black marking. For more information regarding laser sprays, please click here.