These laser machines are equipped with the highest safety standards of laser class 1. Standard delivery includes a 2-year warranty and software updates. Also included as standard are dust-free guide rails, LightBurn software, ultrasonic autofocus, red pointer, Siemens safety components, software-controlled air valve, and exhaust delay.
These laser machines are equipped with the highest safety standards of laser class 1. Standard delivery includes a 2-year warranty and software updates. Also included as standard are LightBurn software, red pointer, and safety components from Siemens.
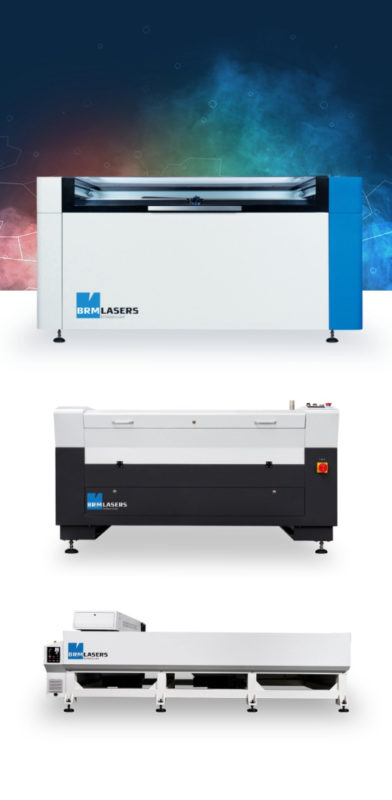
This machine with an - literally - open bed can process large sheet materials. This allows you to effortlessly cut large objects or easily obtain large quantities from a single sheet.
How do I find the circle pulse of the chuck rotation BRM Original?
I have a BRM Original and a chuck rotation. Now I need to set my circle pulse but where do I find it and what is the circle pulse?
The circle pulse is the ratio of the number of steps the motor requires to rotate 1 time. Depending on the motor of the rotation unit, the number of pulses differs and requires a different value. For example, if it needs 7500 pulses to rotate once, the circle pulse is also 7500. If the motor needs 6500 pulses for one rotation, the circle pulse is 6500.
The BRM original came with a chuck rotation. Also, a USB stick was supplied along with a checklist. On this USB stick and the checklist, you will find the circle pulse. You can still retrieve the circle pulse yourself if you no longer have the USB stick or checklist.
How do I find out the circle pulse myself?
Make sure you have materials you can test on. A cardboard roll, for example, can be very useful. The test material should be truly round and not conical! Measure the diameter of your test material. This is very precise; it is best to measure the diameter with a caliper if you have one. Please write down the diameter.Place the chuck rotation in the laser machine, in line with the bridge. Position the rotation with the motor to the left on the working area, otherwise, your drawing will be mirrored. This does not matter for testing, but it is inconvenient if this happens when you start to process new material.
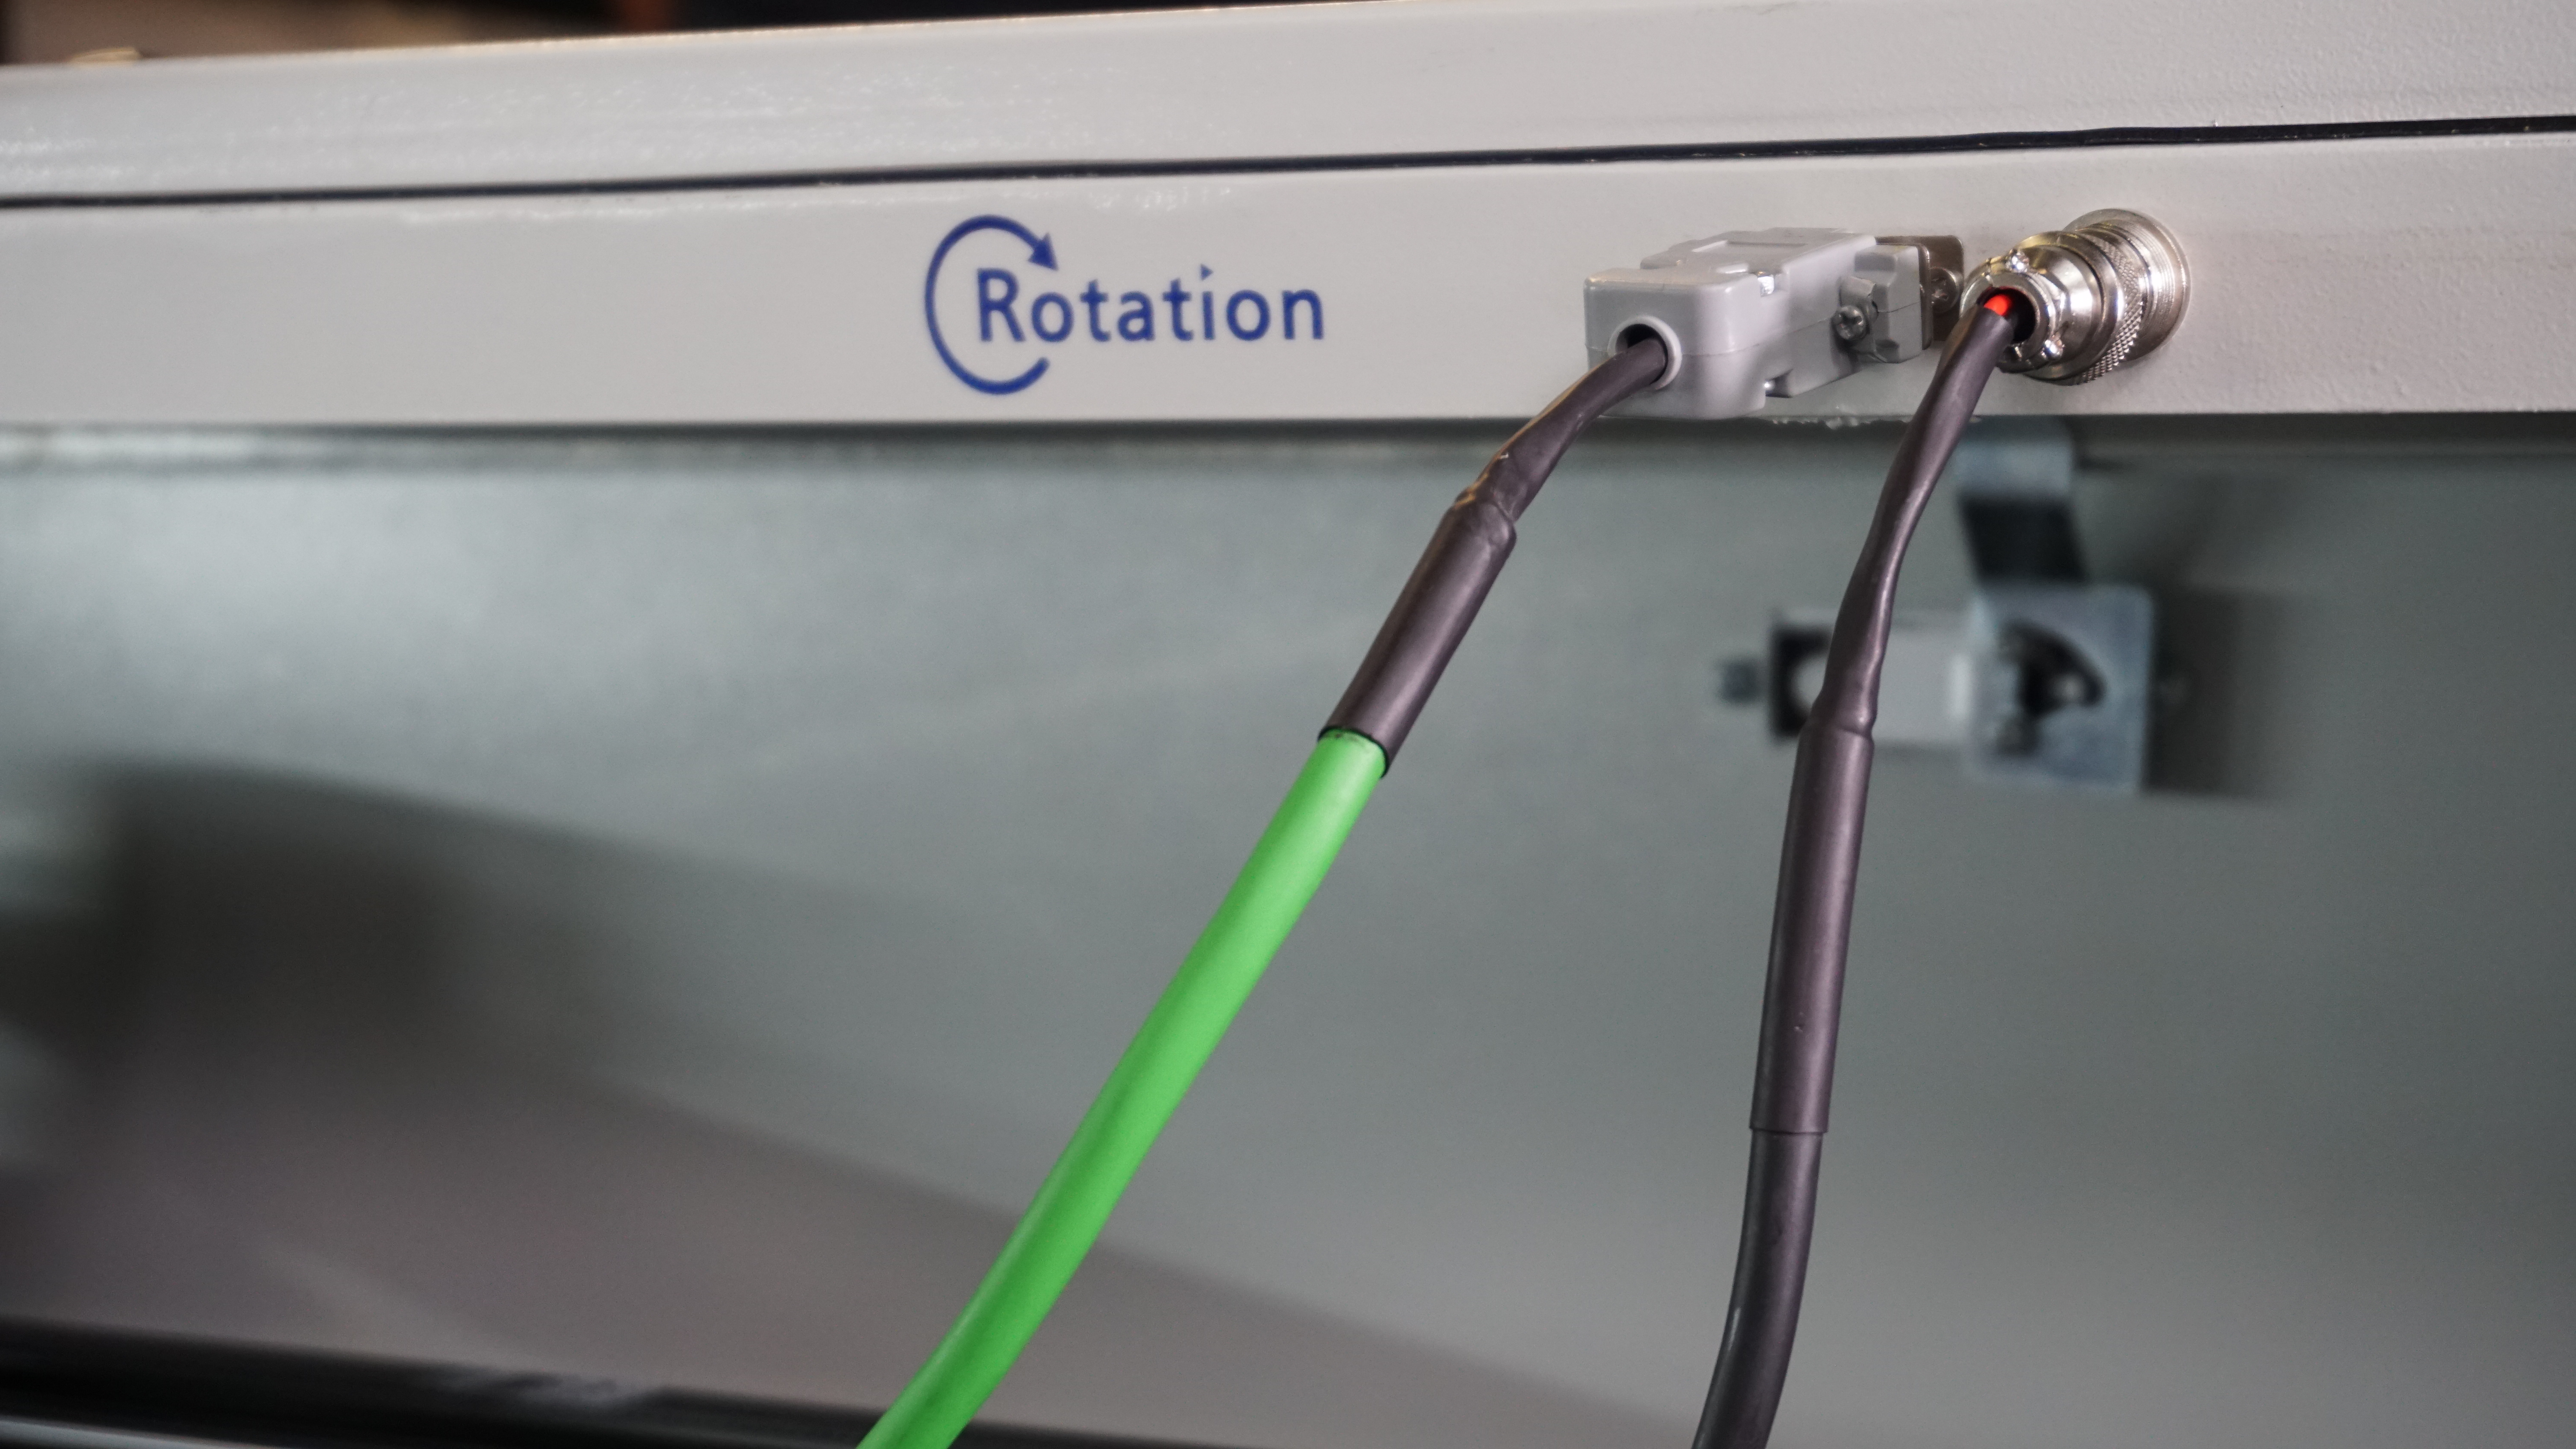
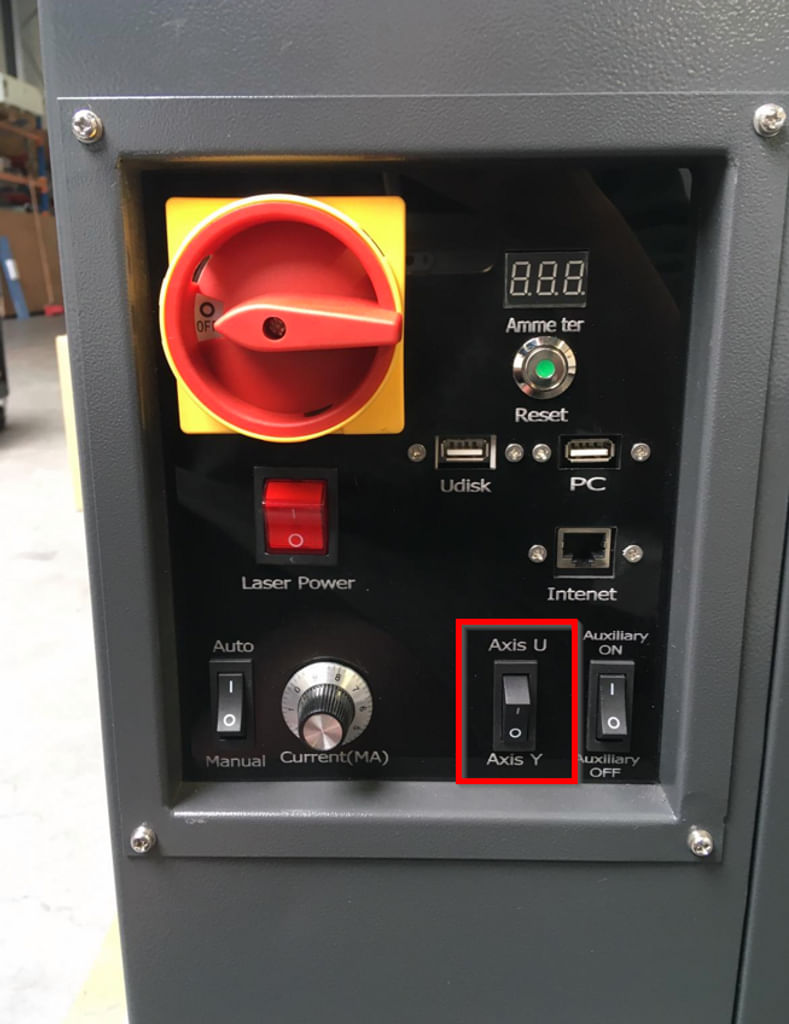
Position the laser head in the upper right corner of the working area. Press "Origin" on the display on the laser machine. Turn off the laser machine and insert the plugs of the rotation into the connectors. You will find the connectors on the right side, inside the cabinet. Once you have connected the plugs you can close the cover. Next, go to the switch panel on the right side of the machine. Here is a switch called the Y/U switch. Make sure you have the switch set to the U position. If the switch is still on the Y, then you need to move the switch to the U.
Turn on the laser machine again following the normal procedure. You will notice that the laser head will not move in the Y direction. If you press the Y- or Y+ buttons on the display, the rotation will start to rotate. The X-axis will also work as usual. Once the laser machine is switched back on completely, you can start clamping your test material in the chuck rotation. Make sure it is secured and cannot slip away.Move the X-axis to the center of your product. Since the Y-axis does not work, you will have to manually move the bridge towards you to position the laser head above your material. Make sure the nozzle (the point at the bottom of the lens shaft) is above the highest point of your test material. Now adjust the focus height. On the display, press the Origin button.
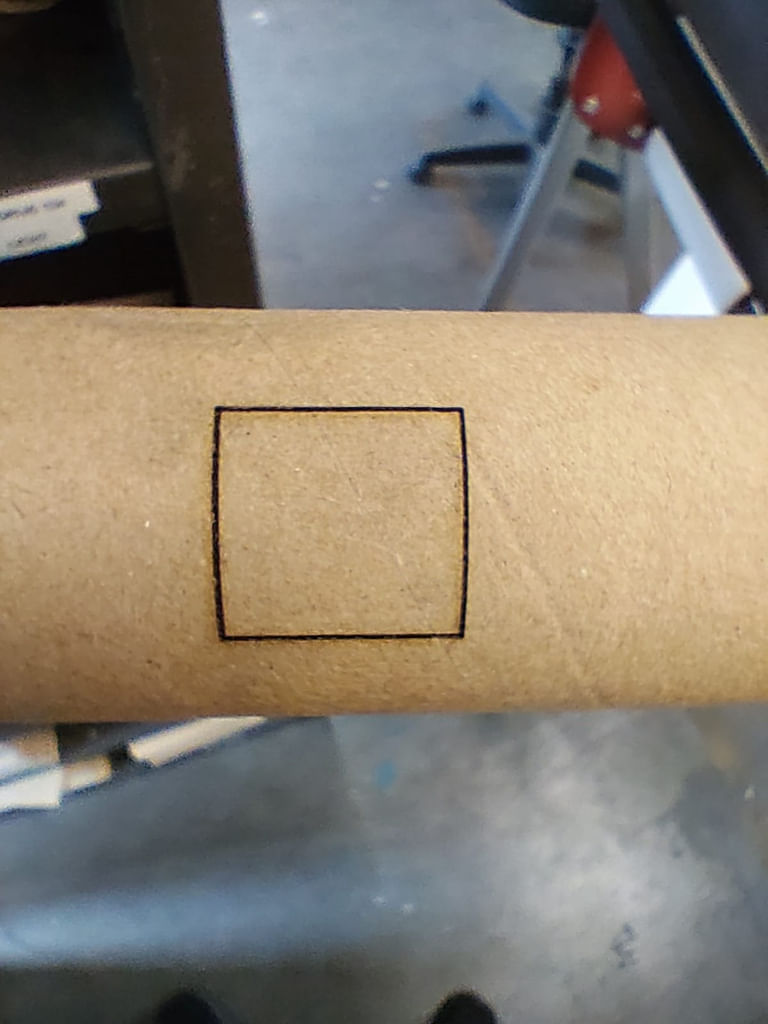
Then, in the laser software, draw a square of 2 by 2 cm. Set the parameters to cutting. However, take the speed and power that you would use for engraving. After all, you want to make a mark on your test piece; you don't want to cut through it.
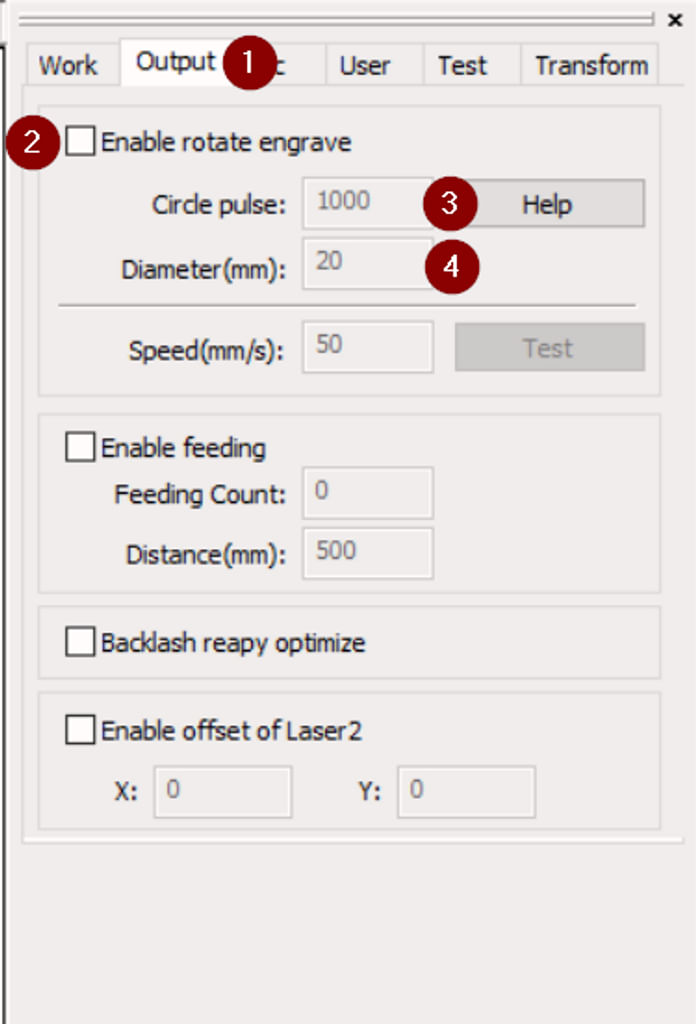
After that, go to the Output tab. Check the box next to Enable rotate engrave. Take a Circle pulse of 7000. Next to Diameter, enter the diameter of your test product. Now send your file to the machine.
Retrieve the file in the machine. Start ‘cutting’ the file. Once the machine is ready remove the product from the chuck rotation. Measure the line across the curve of the product. It is important to measure properly, it is best to use a tape measure here.
Most likely the line across the curve is not exactly 2 cm. It will be larger or smaller. Try a circle pulse of 6500 or 7500 and see what happens. This way you can, first in some larger steps and when you are closer, in small steps determine the circle pulse. Keep adjusting the circle pulse until the line across the curve is indeed 2 cm.
If you can't work it out or have any questions, please feel free to submit a ticket.