These laser machines are equipped with the highest safety standards of laser class 1. Standard delivery includes a 2-year warranty and software updates. Also included as standard are dust-free guide rails, LightBurn software, ultrasonic autofocus, red pointer, Siemens safety components, software-controlled air valve, and exhaust delay.
These laser machines are equipped with the highest safety standards of laser class 1. Standard delivery includes a 2-year warranty and software updates. Also included as standard are LightBurn software, red pointer, and safety components from Siemens.
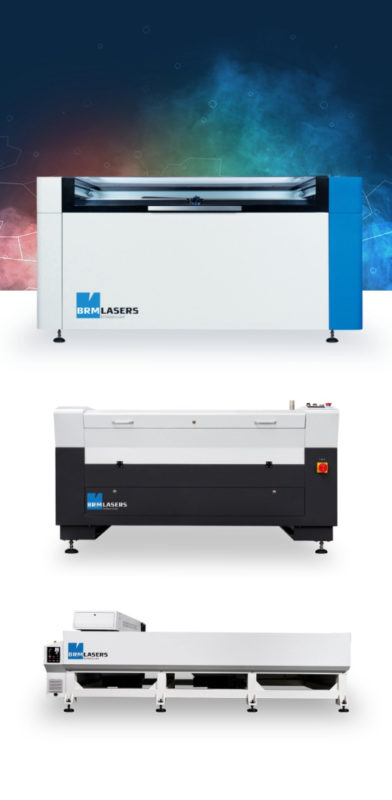
This machine with an - literally - open bed can process large sheet materials. This allows you to effortlessly cut large objects or easily obtain large quantities from a single sheet.
This error occurs if one of the doors of the laser machine is not closed properly. This applies to all doors of the areas the laser beam can reach. This error can also occur when the doors are closed but that signal is not registered.
If the doors are closed properly, you can open the doors one by one and close them again. If one of the sensors does not register the closed door properly, this may cause it to re-register and work properly. If all the doors are closed and opening and closing them all again does not work, it may be that one of the sensors is no longer functioning. In this case, an on-site technician is required.
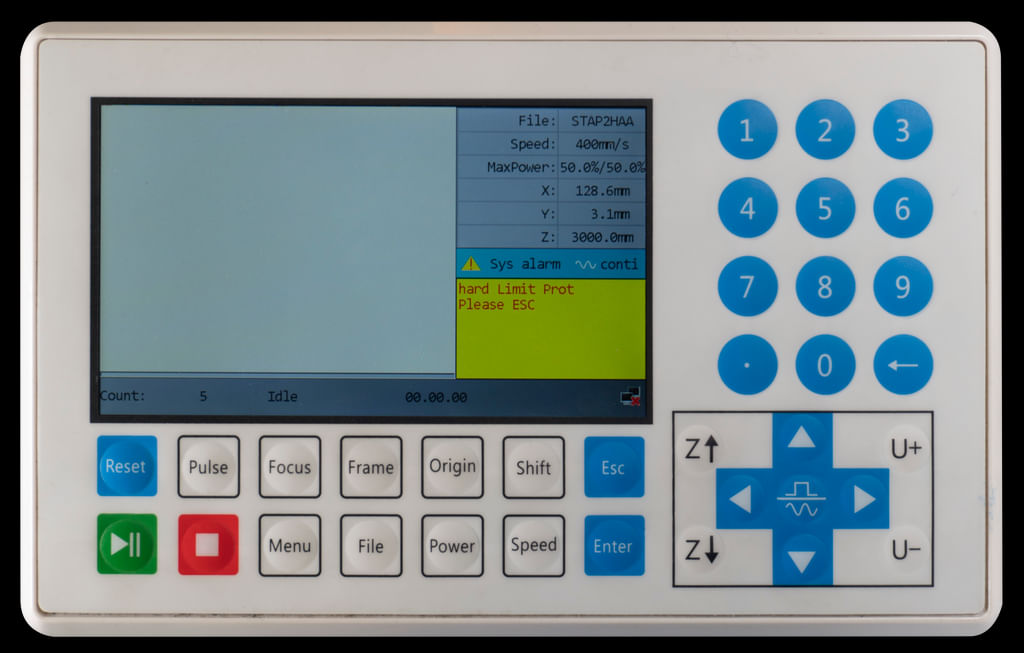
Hard Limit Prot
This error appears when the Y, X, or Z sensors are reached. It may occur, for example, when you have not referenced the sensor, the Hard Limit Prot can occur when the X- or Y-axis detects the sensor. The axis can then not move any further and an error occurs.
You can avoid the Hard Limit Prot by always referencing the axes when you switch the machine on. The Hard Limit Prot on the Z-axis can be prevented by making sure the laser head is not set too low when working with the autofocus. You also need to slightly lower the Z-axis from the top position to make sure there is enough space to get the correct height between material and autofocus sensor.In the diagnostic screen [Menu => Function+ => Diagnoses+] you can check the Hard Limit Prot so you can see to which axis it applies.
X Slop over
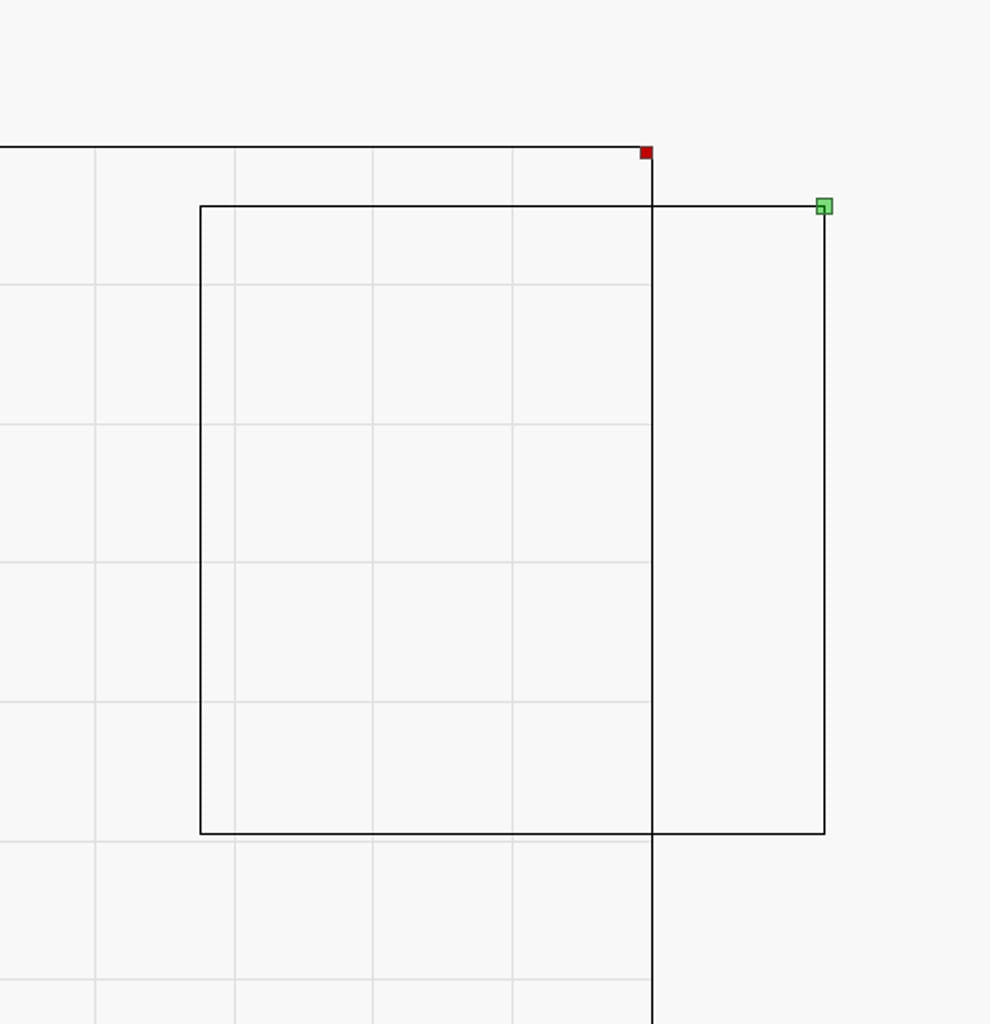
This error occurs when the machine has to move out of the range of the X-axis to cut / engrave the work. This can be the case, for example, when you want to cut or engrave the product in a corner and you have set the origin of the work outside the work area.
Below is a screenshot to illustrate this. If the machine notices that part of your work is outside the work area, it cannot make the move.
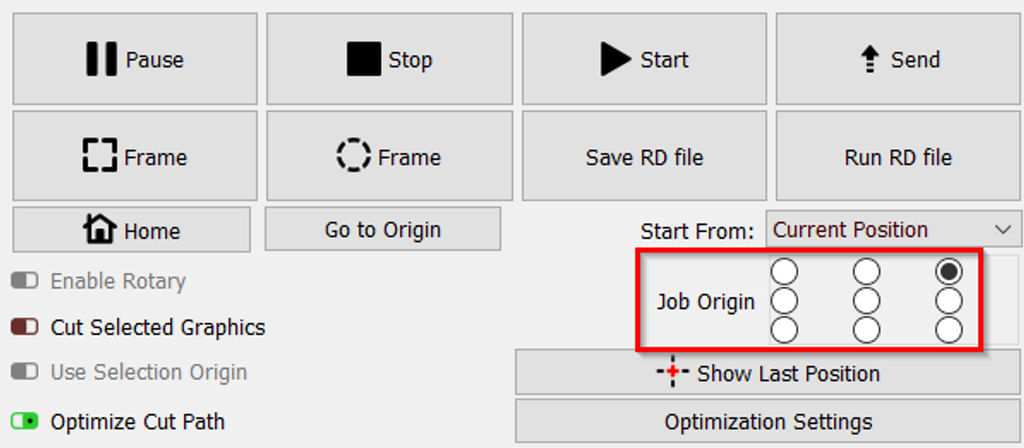
When you work with the Origin button on the machine, you need to move the axes to a position further from the edge. Then click Origin again to set the new position as the origin.
When using the Absolute Coordinate from the software, you need to move the drawing in the software so it is further from the edge.
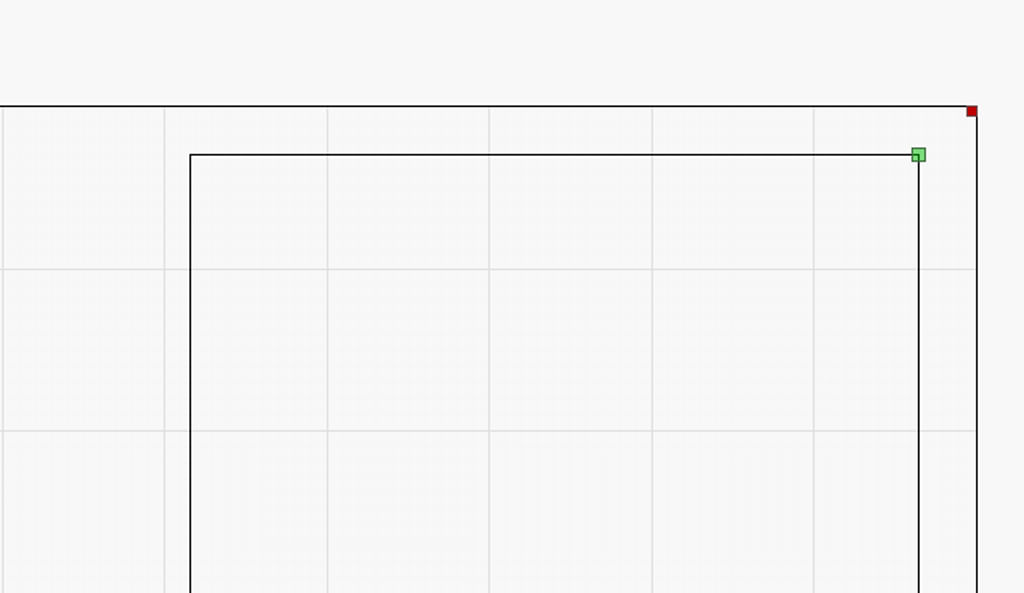
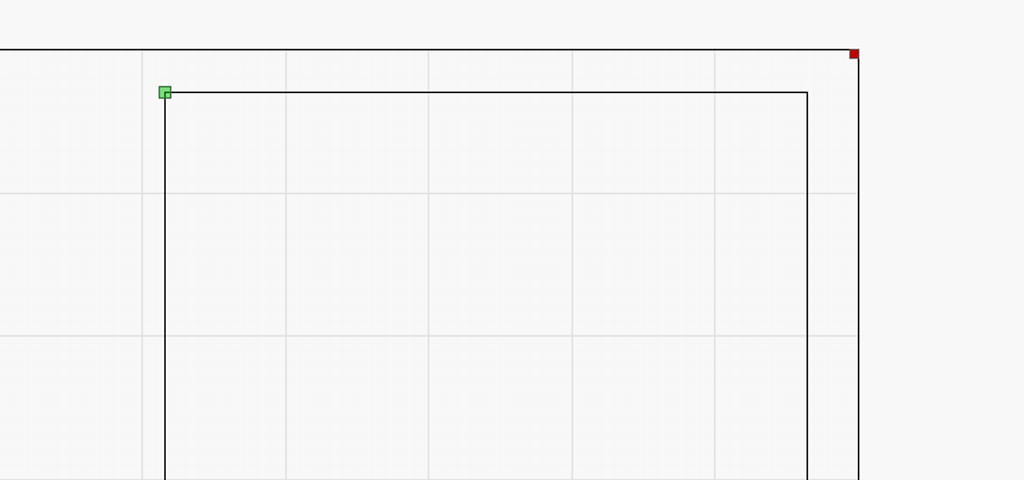
You also have to check the software to see where the origin of your drawing is located. If you intend to work in the top right corner and have pressed the Origin button to set the origin here, it may be that the origin of the drawing is in the top left corner. As a result, the machine calculates from the top left corner and the laser head must move to the right. This is impossible, however, because the machine's work area stops here. If you set the origin of the drawing to the top right, you can start cutting at this spot because the laser head will now move to the left and there is enough space here.
The green dot in the drawing indicates the origin of the drawing. See the examples below.
To change the origin of the drawing, you can choose from several points:
This error can also occur when you are going to do an engraving / marking that is too close to the edge of the work area. During engraving / marking, the laser head needs space to accelerate and decelerate. Your work will then be within the working area, but there will be insufficient space for the machine to reach speed or slow down. The error will also occur in this case.
Below is an example of the error occurring during engraving.
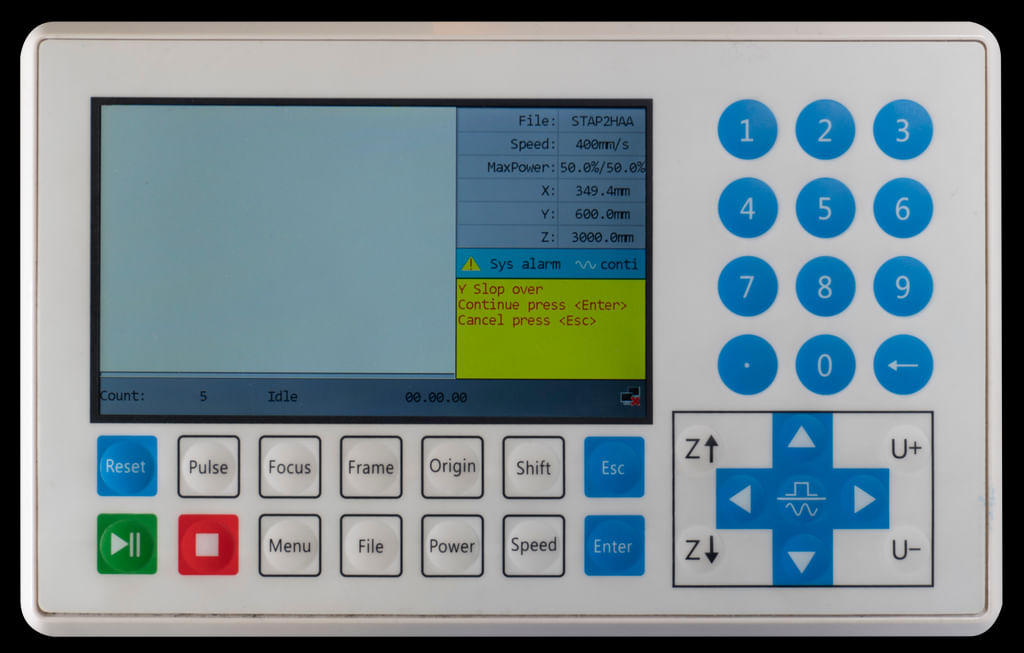
If this is the case, you will need to move your work more to the center of your workspace.When you select Continue and press [Enter], the machine may start doing what it is supposed to do. However, the error will return as soon as it receives the signal that the laser head should move outside the work area. This may occur, for example, halfway through your engraving and then you will have to stop the program. Press [Esc] to stop the program. You can select another place to start working and then press [Start] again.If you choose Cancel and press [Esc], you will stop and can choose a new position to work.
Y Slop over
This error occurs when the machine has to move out of the range of the Y-axis to cut / engrave the work. This can be the case, for example, when you want to cut or engrave the product in a corner and you have set the origin of the work outside the work area.
Below is a screenshot to illustrate this. If the machine notices that part of your work is outside the work area, it cannot make the move.
When you work with the Origin button on the machine, you need to move the axes to a position further from the edge. Then click [Origin] again to set the new position as the origin.
When using the Absolute Coordinate from the software, you need to move the drawing in the software so it is further from the edge.
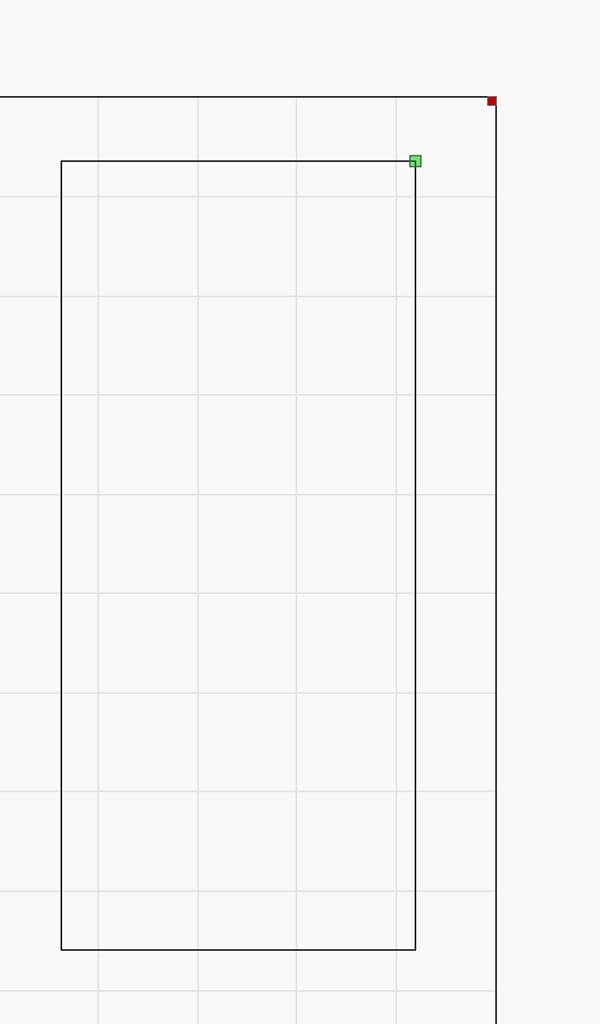
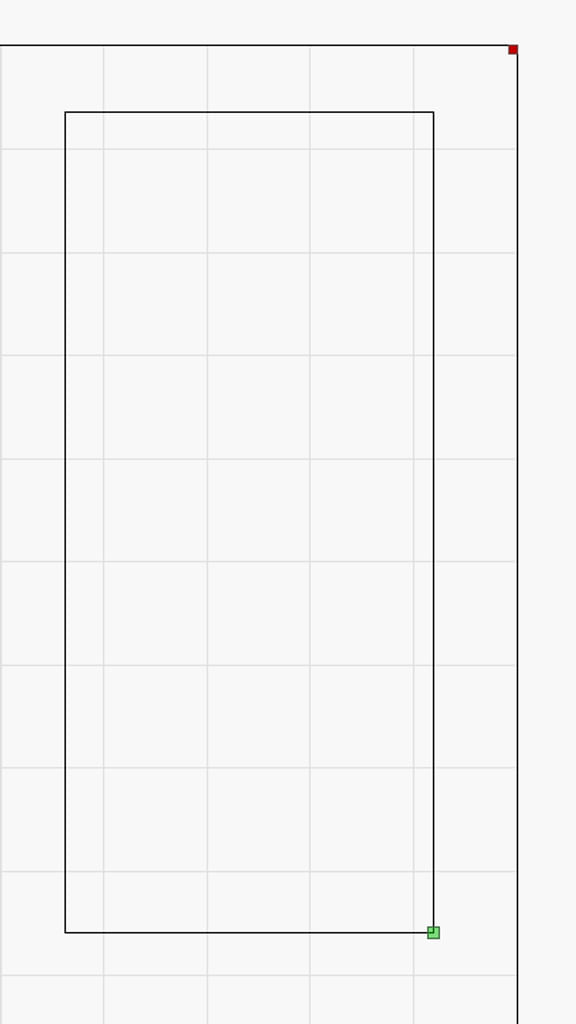
You also have to check the software to see where the origin of your drawing is located. If you intend to work in the top right corner and have pressed the Origin button to set the origin here, it may be that the origin of the drawing is in the top left corner. As a result, the machine calculates from the top left corner and the laser head must move to the right. This is impossible, however, because the machine's work area stops here. If you set the origin of the drawing to the top right, you can start cutting at this spot because the laser head will now move to the left and there is enough space here.
The green dot in the drawing indicates the origin of the drawing. See the examples below.
To change the origin of the drawing, you can choose from several points:
This error can also occur when you are going to do an engraving / marking that is too close to the edge of the work area. During engraving / marking, the laser head needs space to accelerate and decelerate. Your work will then be within the working area, but there will be insufficient space for the machine to reach speed or slow down. The error will also occur in this case.
Below is an example of the error occurring during engraving.
If this is the case, you will need to move your work more to the center of your workspace.
If the error occurs while working with the rotation axis it will help to move the rotation, using the U+ and U- keys. Basically, the rotation can rotate infinitely. Instead, the rotation is given the dimensions of your workspace. If your workspace on the Y-axis is 900 mm, then the rotation workspace will also be 900 mm. Using the rotation, it is also possible that you are getting too close to the edges of your workspace. If you get the Y Slop over error, do a few rotations by using the U+ and U- buttons. Press the Origin button on the display of the machine.
When you select Continue and press [Enter], the machine may start doing what it is supposed to do. However, the error will return as soon as it receives the signal that the laser head should move outside the work area. This may occur, for example, halfway through your engraving and then you will have to stop the program. Press [Esc] to stop the program. You can select another place to start working and then press Start again.If you choose Cancel and press [Esc], you will stop and can choose a new position to work.
Frame slop
This error occurs when you are framing and your work is outside the work area.
If you are sure that your work is located in the middle of the working area, you may have a guideline or frame in the software you do not want to cut. However, this guideline will be included during the framing process.
It may also be the case that you have not pressed the Origin button yet. The machine will then pick the last Origin you entered. This origin might be close to the side of the machine so your work does not fit into the work area causing the error.
When using the Absolute Coordinate from the software, you need to move the drawing in the software so it is further from the edge.
You also have to check the software to see where the origin of your drawing is located. If you intend to work in the top right corner and have pressed origin here, it may be that the origin of the drawing is in the bottom right corner. As a result, the machine calculates from the bottom right corner and the laser head must move upwards. This is impossible, however, because the machine's work area stops here. If you set the origin of the drawing to the top right, you can start cutting at this spot because the laser head will now move downwards and there is enough space here. The same goes for the other axis. If you want to work at the top right and you have set the origin at the top left, you will also get the error.
The green dot in the drawing indicates the origin of the drawing. See the examples below.
To change the origin of the drawing, you can choose from several points:
For example, if you have a guide frame that you don't want to cut but the object you do want to cut is small and in the center of the workspace, you can press [Enter] to continue. The framing will continue, however, a piece will be cut off and the framing will no longer be accurate. When you then press the Start button on the display of the laser machine, your product will be cut if it is small enough and far enough from the edges of the work area.
When you click [Esc] to cancel, the framing stops. You can check whether you are trying to work too close to the edges of the work area and work a bit further away from them. You can also check whether there is a guide frame or similar in the drawing that is causing the error. You can press the Origin button again to make sure that you are actually working in the indicated place.
Water prot 1
This error indicates that the signal from the water chiller is not received. If this error is present, you cannot cut or engrave / mark. The water in the laser source must be continuously pumped around to prevent damage.
If the Water prot 1 is going on then the water chiller may not be on. Check to see that the Auxiliary switch is properly set. On the BRM Pro, the switch is on the right side of the machine, on the switch panel. On the BRM Slim, the switch is above the display on the machine. If it is switched on, you can then check whether the water chiller itself is switched on.
When the water chiller is on, the alarm cable at the back of it may not be connected properly or may have come out. If the alarm cable is not connected properly, remove it from the water chiller and plug it in again.
If everything is connected correctly, the water chiller might be indicating an alarm. You can see this on the display of the water chiller. It may show an error code. The red light below the display may also be lit and the alarm signal may sound.
Depending on the type of malfunction of the water chiller, a BRM technician may be required.If everything is switched on and the water chiller does not raise an alarm but the error persists, a BRM technician is required.
When you press [Enter], the machine will start the cutting / engraving movement, but there will be no laser beam and therefore no cutting / engraving will take place.Pressing [Esc] stops the program.
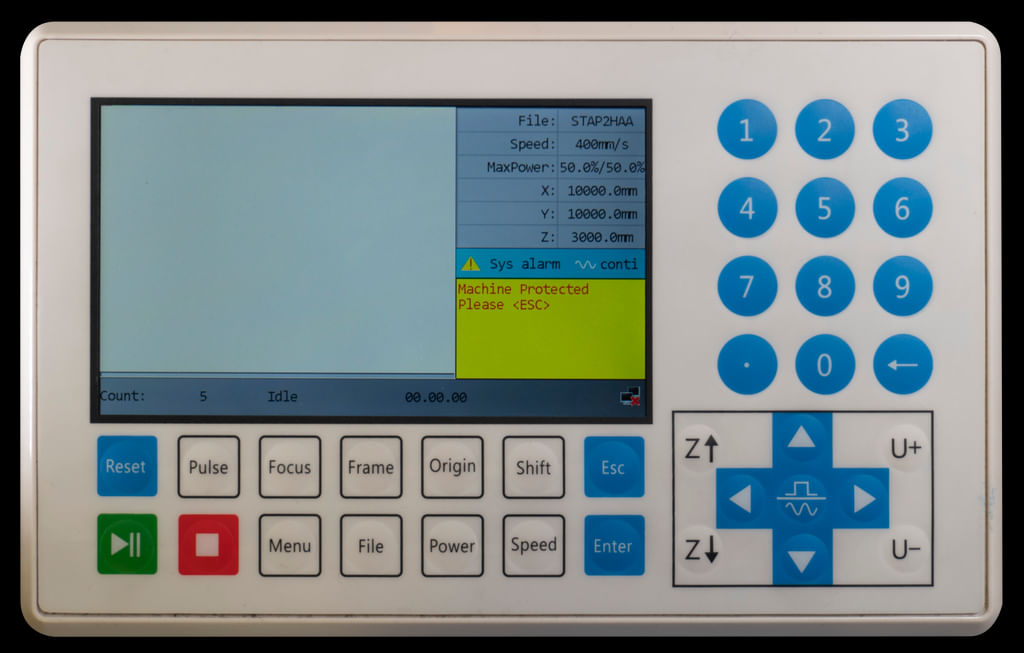
Machine Protected
This error occurs if one of the doors is not closed properly. This applies to all doors of the areas the laser beam can reach. This error can also occur when the doors are closed but that signal is not registered.
If the doors are closed properly, you can open the doors one by one and close them again. If the sensor does not register the closed doors properly, this may cause it to re-register and work properly.
If you have checked the doors and everything seems to be correct then you can press [Enter] to continue. The machine has gone into pause mode so when you press [Enter] you continue where you left off.
Pressing [Esc] stops your program. The laser head goes back to where you started cutting / engraving. If you want to continue with the same program you will have to start it again.
If all the doors are closed and opening and closing them all again does not work, it may be that one of the sensors is no longer functioning. In this case, an on-site technician is required.