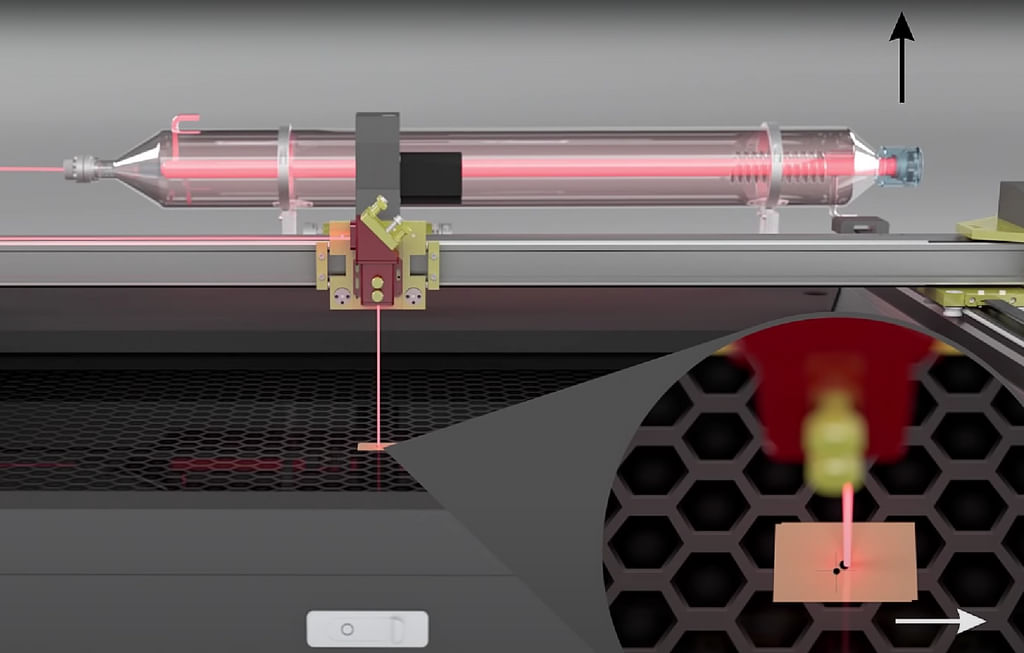
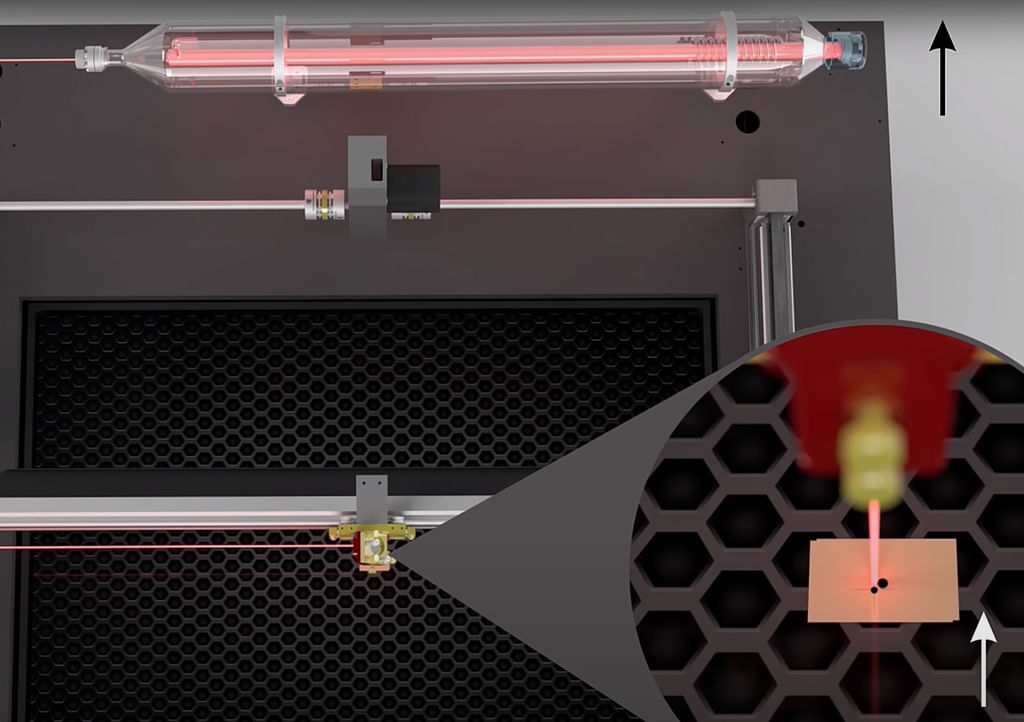
The laser machine works with a laser beam. This laser beam passes from the laser source via mirrors to the lens in the laser head, after which the laser beam hits your material. If you notice that you are losing power, your results are not getting as good as you are used to, or there is no laser beam, it is crucial to check whether the mirror alignment is still optimal. If that is not optimal, you will not get clean lines, and you may also need to use more power.
Of course, it is also important that the lens and mirrors are spotless. The coating should be neat, there should be no haze or burn-in, and if there is a crack in the lens, this will also affect the cutting result. The easiest way is to clean everything first and then check the mirror alignment.
Mirror alignment
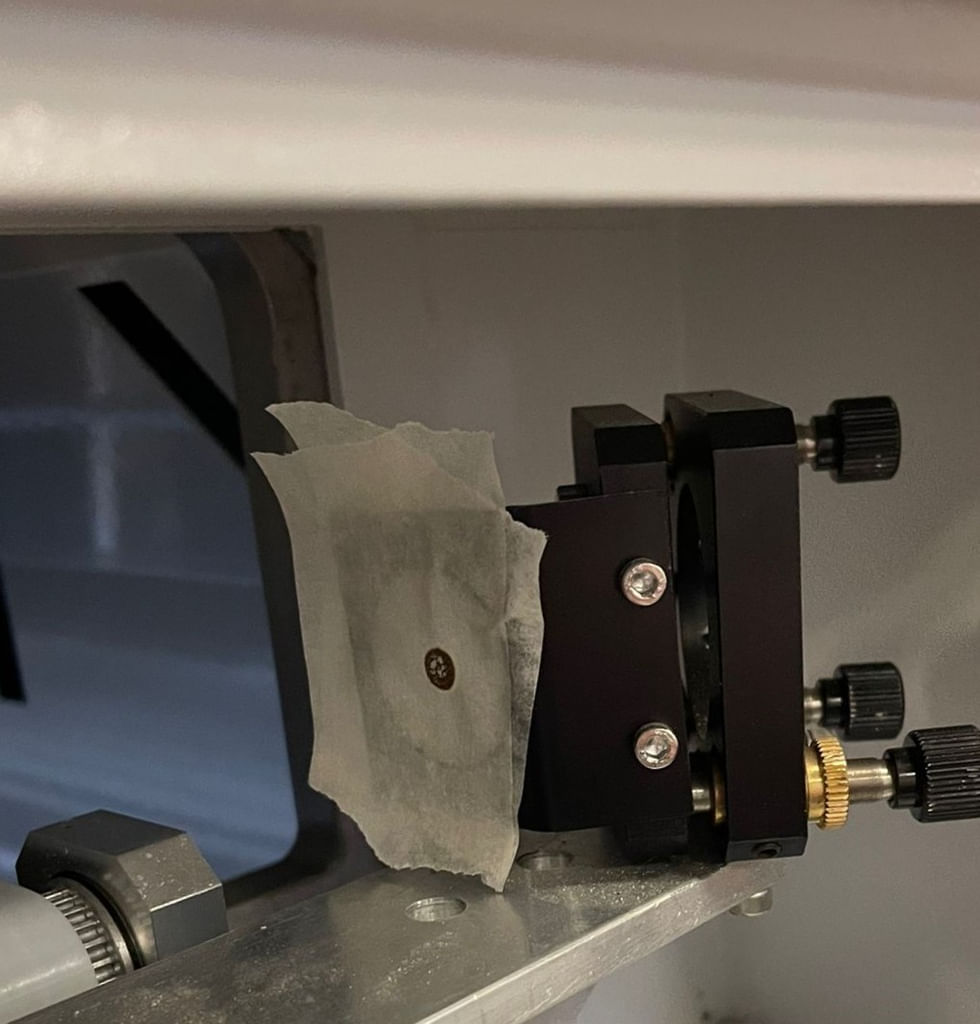
On the left side of the bridge is a door. If you open it you will see two black mirror holders. There are small socket screws on the sides of the holders. These ensure that the adjusting bolts and nuts are secured. Take an Allen key and check that these sockets are tight. If they are loose, then you will need to tighten them.
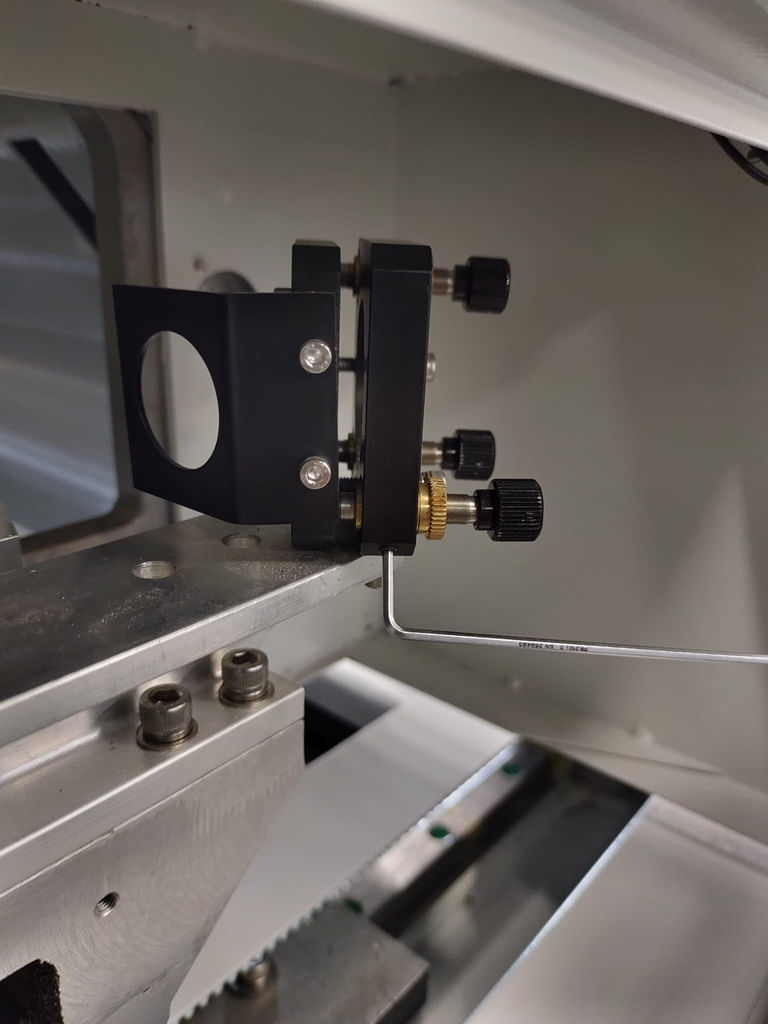
When the Allen bolts are tightened properly, tape two pieces of masking tape together and stick them to the opening on the right mirror holder. Close the door and set a pulse. The pulse should be positioned nicely in the center of the opening.
Second mirror
If the pulse is not positioned in the center of the opening, you need to adjust the left mirror. There are 3 adjustment bolts on the mirror holder, in an L-shape.

First mirror
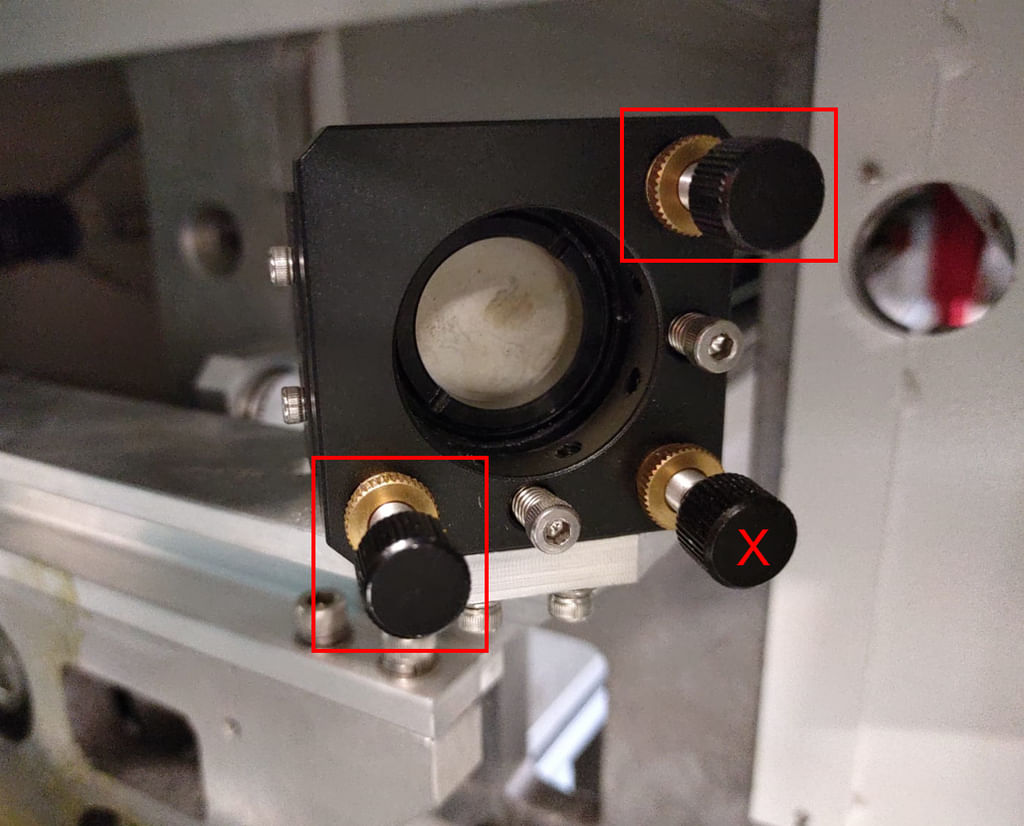
To adjust the mirror, use the adjustment bolts at the bottom left and top right. You don't use the lower right adjustment bolt! You also don't use the Allen bolts.
The upper right adjustment bolt is used for the height adjustment of the laser beam. The adjustment bolt on the bottom left is for adjusting the laser beam to the left and right.
If you want to use the adjustment bolts, first loosen the locking nut slightly so you can use the adjustment bolt. When you have finished using the adjustment bolt and are content then tighten the locknut again. Set a pulse once more, as the bolt may be slightly twisted, while tightening the locking bolt.
Every time you set a new pulse, it is necessary to move the top layer of masking tape a bit so you can clearly see where the new pulse is placed. Each time you have used the adjustment bolt, retighten the locking bolt.
When the pulse hits the center of the opening, then remove the masking tape. Close the door and open the front cover so you can see the laser head. There is an opening on the left side of the laser head. Stick 2 layers of masking tape on it and close the front cover. Move the laser head to the left side of the machine as far as possible. Set a pulse.
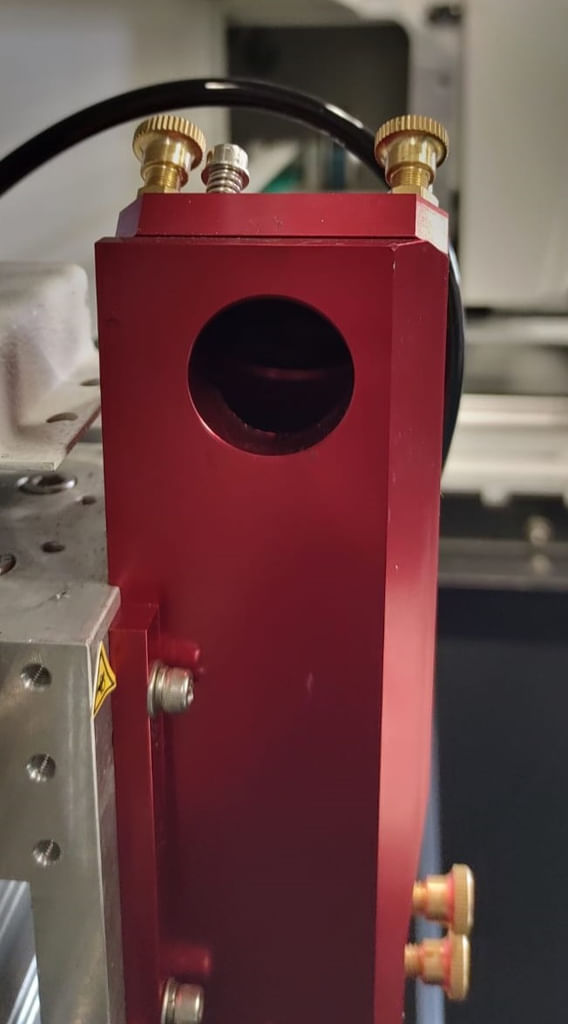
Move the laser head to the right side of the machine and open the front cover. Stick a third piece of masking tape over the tape that's already over the opening. Close the front cover and ensure the laser head is on the far right side of the working field. Set a pulse.
Compare the 2 pulses with each other. The pulses should be on top of each other and in the center of the opening of the laser head. If they are not in the middle or not on top of each other, you will need to adjust the second mirror. You will find the second mirror behind the door on the left side of the bridge.
Second mirror
To adjust the mirror, use the adjustment bolts at the bottom left and top right. You don't use the lower right adjustment bolt! You also don't use the Allen bolts.
The upper right adjustment bolt is used for the height adjustment of the laser beam. The adjustment bolt on the bottom left is for adjusting the laser beam to the left and right.
If you want to use the adjustment bolts, first loosen the locking nut slightly so you can use the adjustment bolt. When you have finished using the adjustment bolt and are content then tighten the locking nut again. Set a pulse once more, as the bolt may be slightly twisted, while tightening the locking nut.
Every time you set a new pulse, it is necessary to move the top layer of masking tape a bit so you can clearly see where the new pulse is placed.
When the pulse hits the center of the opening nicely, remove the masking tape.
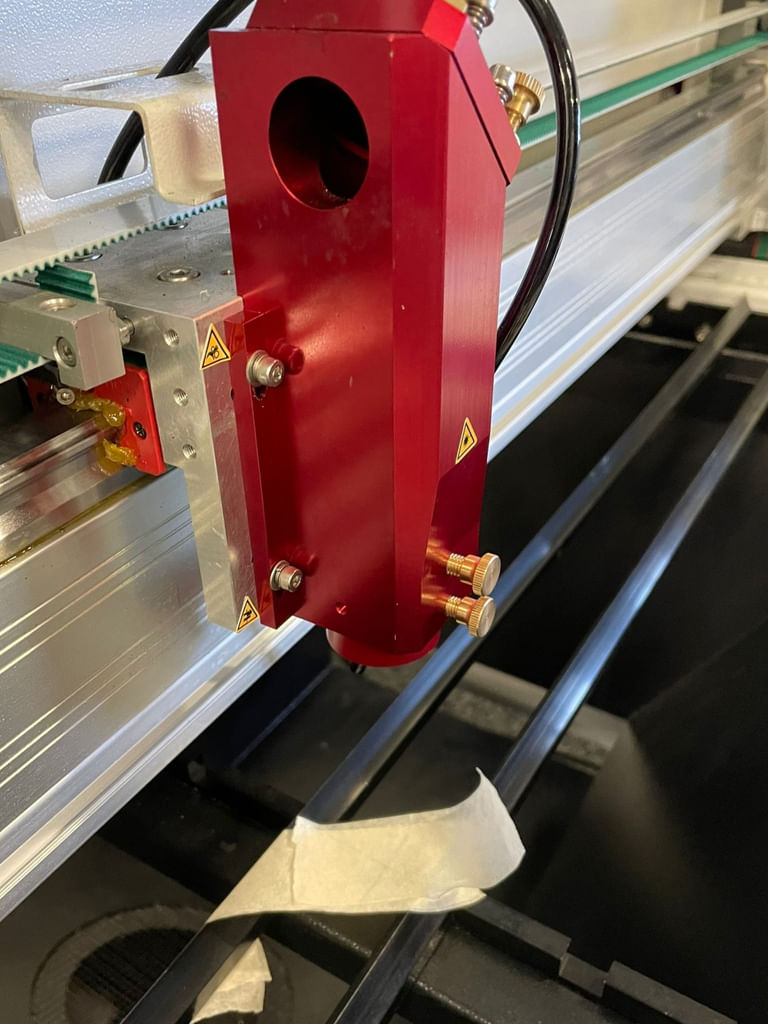
Mirror on the laser head
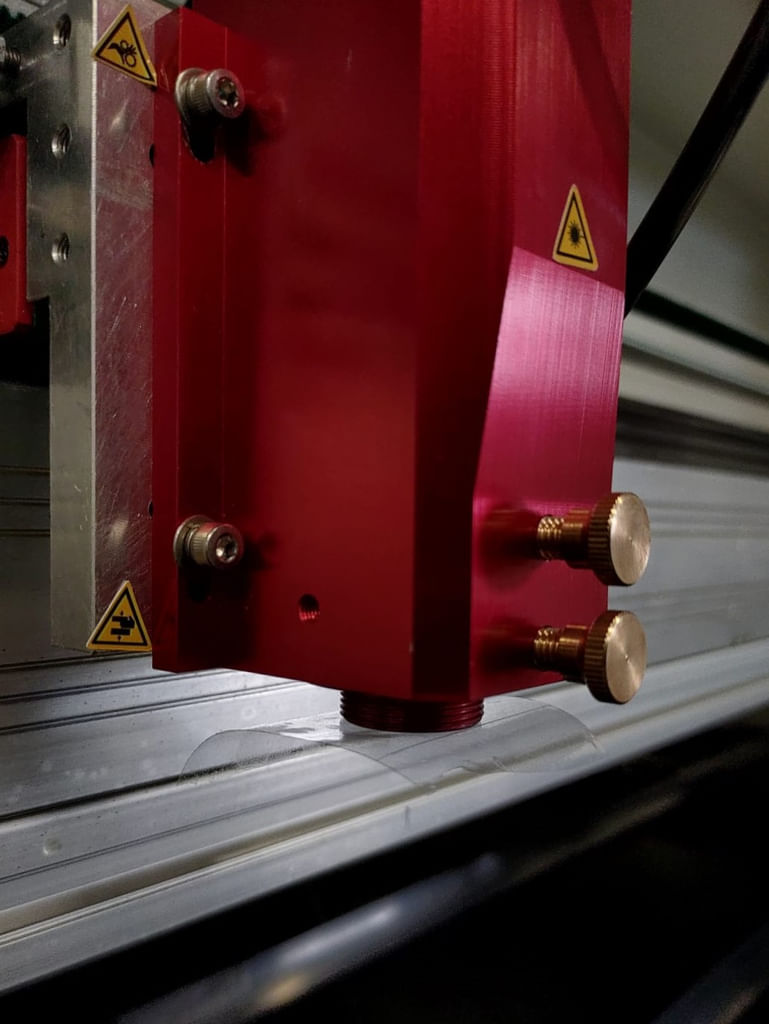
To check the mirror alignment of the mirror on the laser head, you need to remove the lens shaft from the laser head. The lens shaft consists of 2 parts that are screwed together. Unscrew the parts from each other.
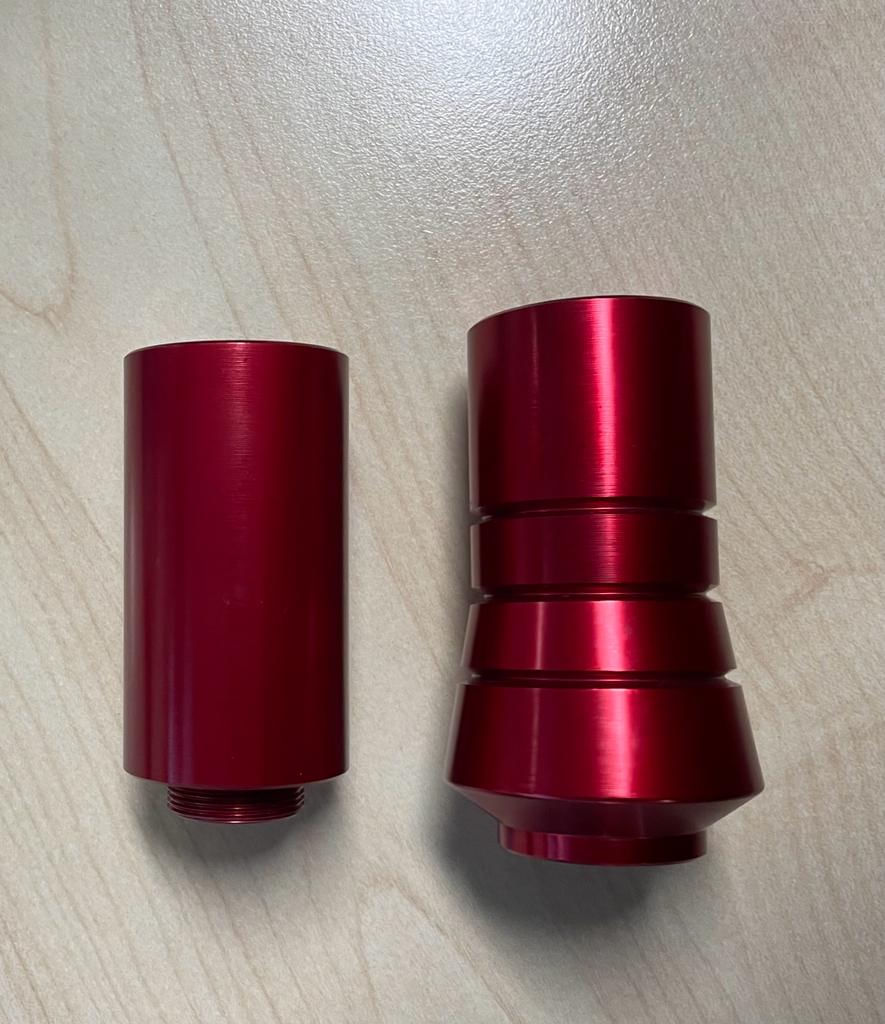
Set the lower part aside, you won't need it now.
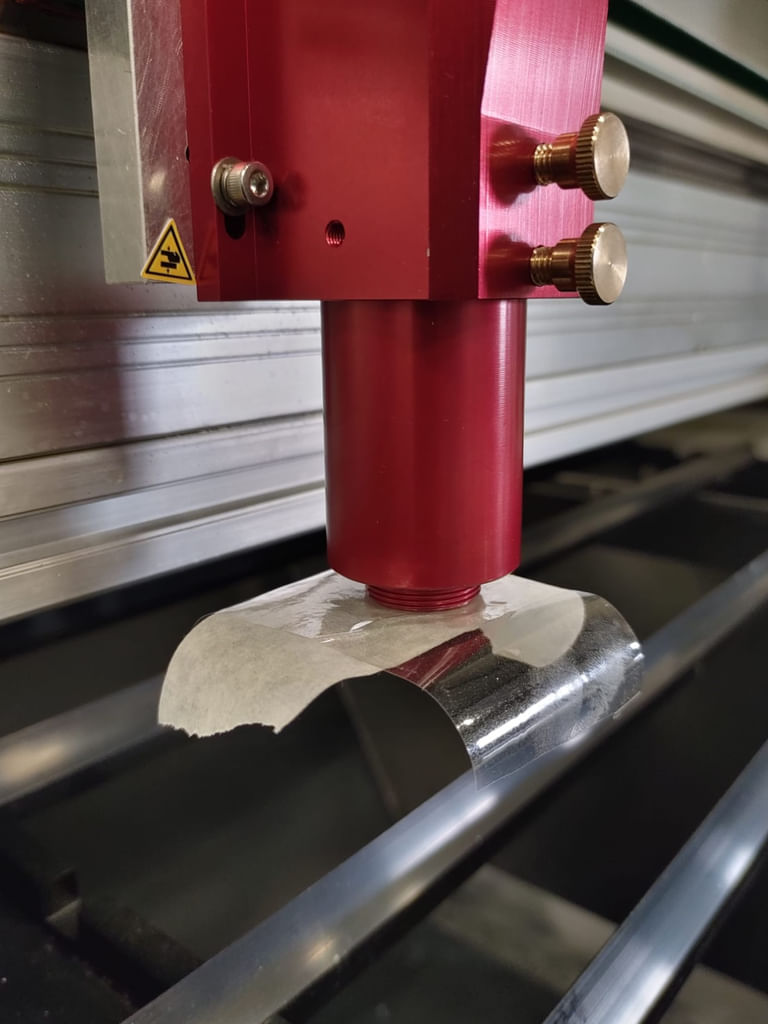
The upper part is threaded at the bottom. Stick a piece of wide, transparent tape on this thread so it covers the opening. Place this part of the lens shaft back into the laser head, as high as possible.

Close the front cover and set 2 pulses. Lower the lens shaft down straight. Do not rotate it! Secure the shaft at the lowest position. Take a piece of masking tape and stick it crosswise onto the clear tape. Set a pulse.
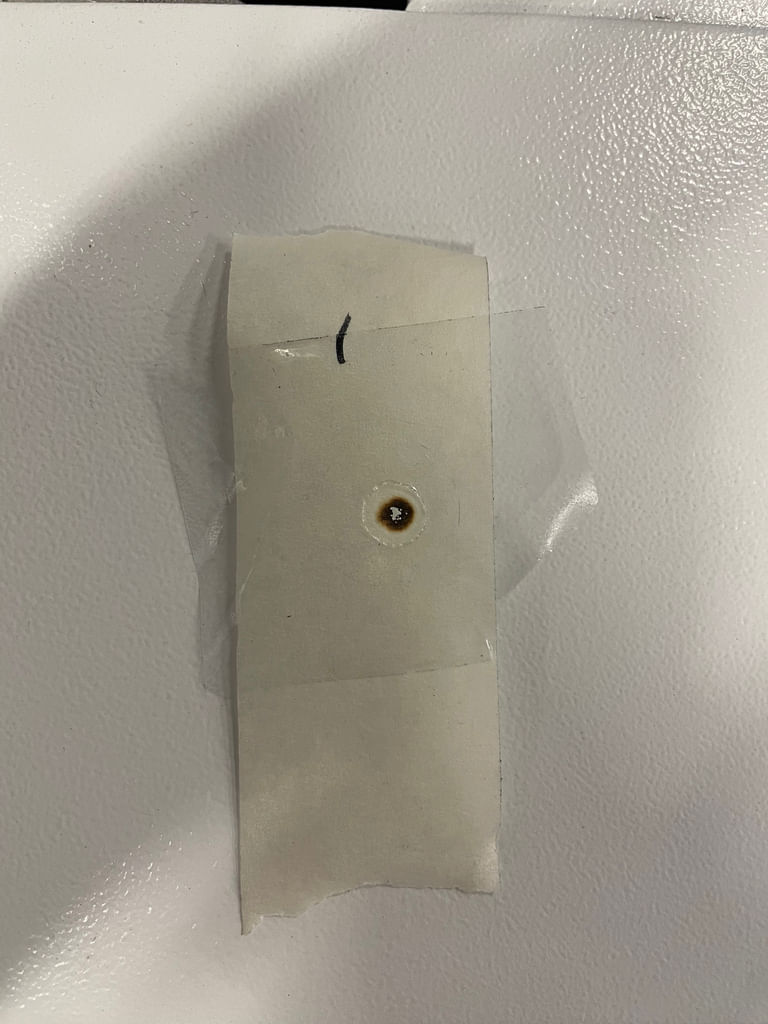
Before removing all combined tape, mark it so you know what is left, right, bottom and top.
After placing a mark, remove both layers of tape. Leave them on top of each other! There is a large hole in the clear tape. In the center of this hole should be a burn-in on the masking tape. This burn-in should be in the middle of the large hole. If it is not, the mirror on the laser head needs adjusting.
Because you have marked the tape, you know which way the pulse should go. If you haven't it, you don't know where the pulse should go and you will need to start again with this step of the alignment.
The mirror holder on the laser head also has 3 adjustment bolts. You use the top left and bottom right adjustment bolts to adjust the mirror. You don't use the lower left adjustment bolt. Nor do you use the silver Allen bolts.
The bottom right adjustment bolt is used to align the laser beam to the left or right. The upper left adjustment bolt is used to adjust the laser beam up and down.
If you want to use the adjustment bolts, first loosen the locking nut slightly so you can use the adjustment bolt. When you have finished using the adjustment bolt and are content then tighten the locking nut again. Repeat the whole test because the bolt may have twisted slightly while tightening the locknut, and then the alignment will still be wrong.
Source on plus
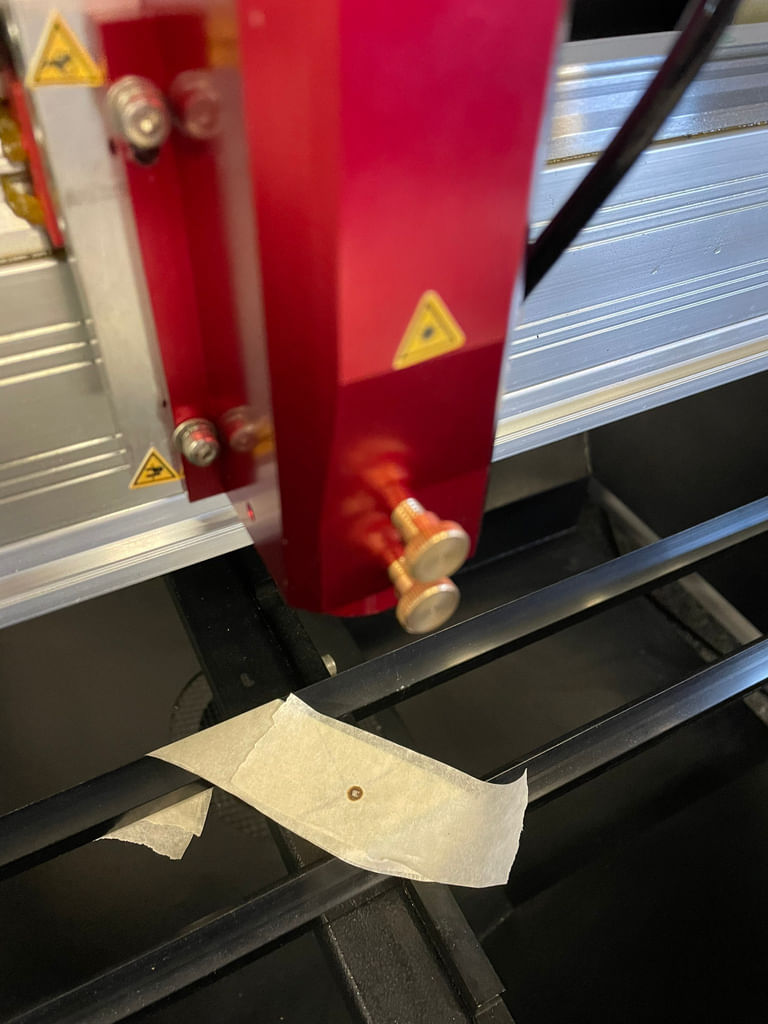
If all mirrors are in place, it is a matter of checking whether the laser source is properly aligned. Stick a piece of masking tape on 2 slats under the laser head.
Put the upper part of the lens shaft into the laser head. Take the lower part of the lens shaft, which holds the lens, and screw it onto the upper part of the lens shaft.
Set the correct focus height and close the front cover. Set a pulse.
Take a pen and ruler and mark a 'plus' across the pulse on the masking tape.
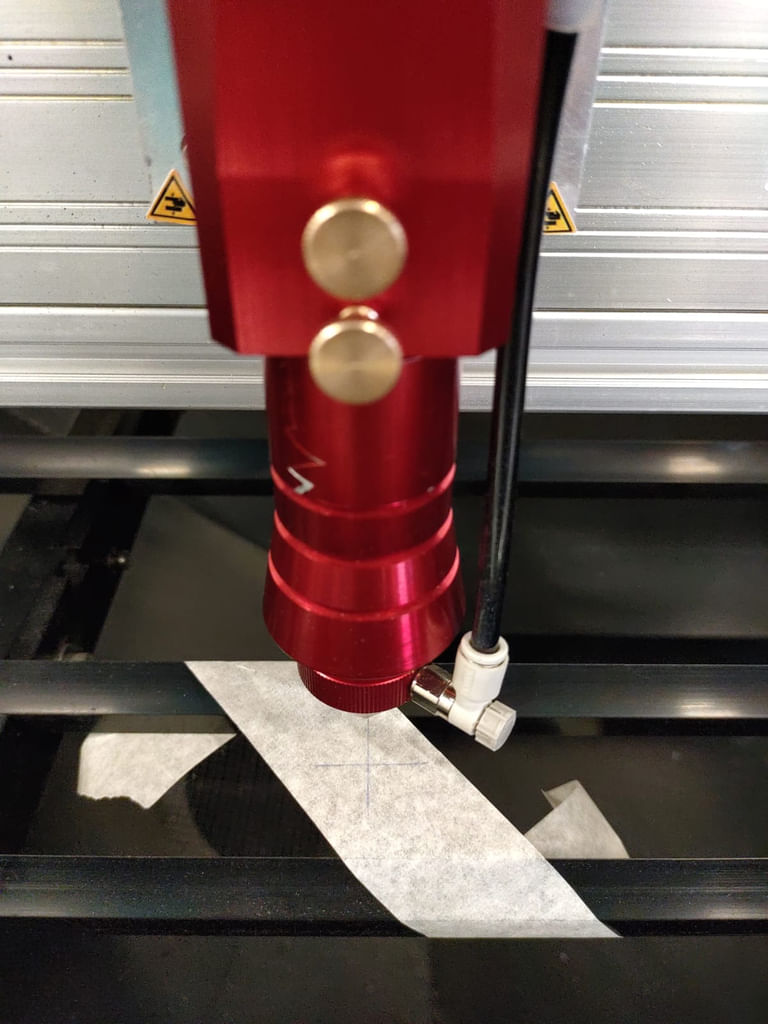
Unscrew the lower part of the lens shaft and set it aside. Stick a layer of masking tape over the piece with the drawn 'plus'. Set a pulse.
The pulse should be in the center of the 'plus'. If this is not the case, the laser source needs to be aligned.
 |
PLEASE NOTE!!! High voltage is lethal. Only qualified people may carry out these operations. |
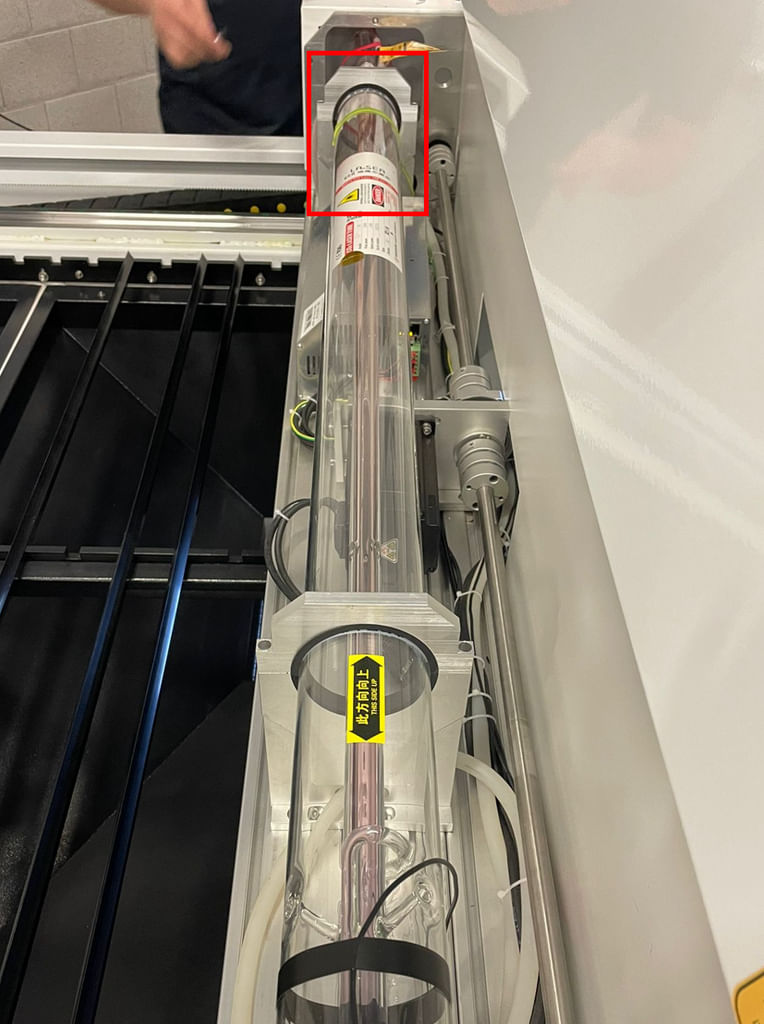
The laser source is located on the bridge. There is a panel over it which is fixed with Allen bolts. Unscrew the Allen bolts and carefully remove the cover.
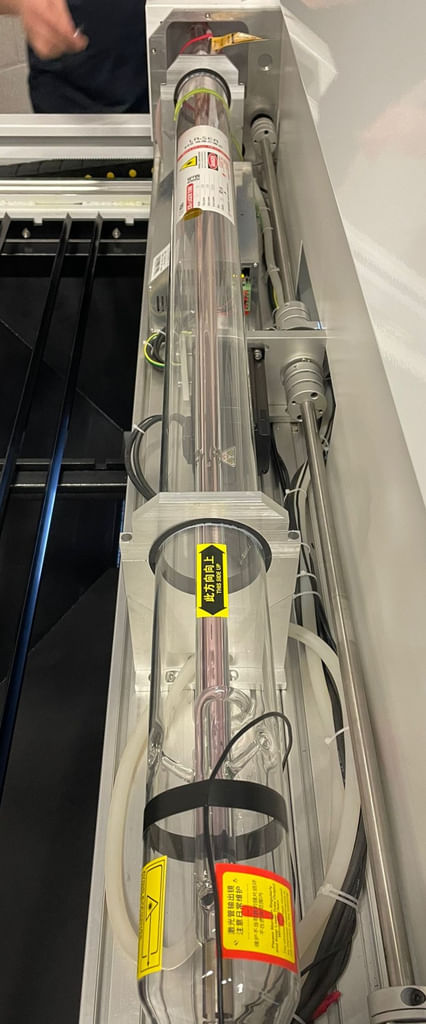
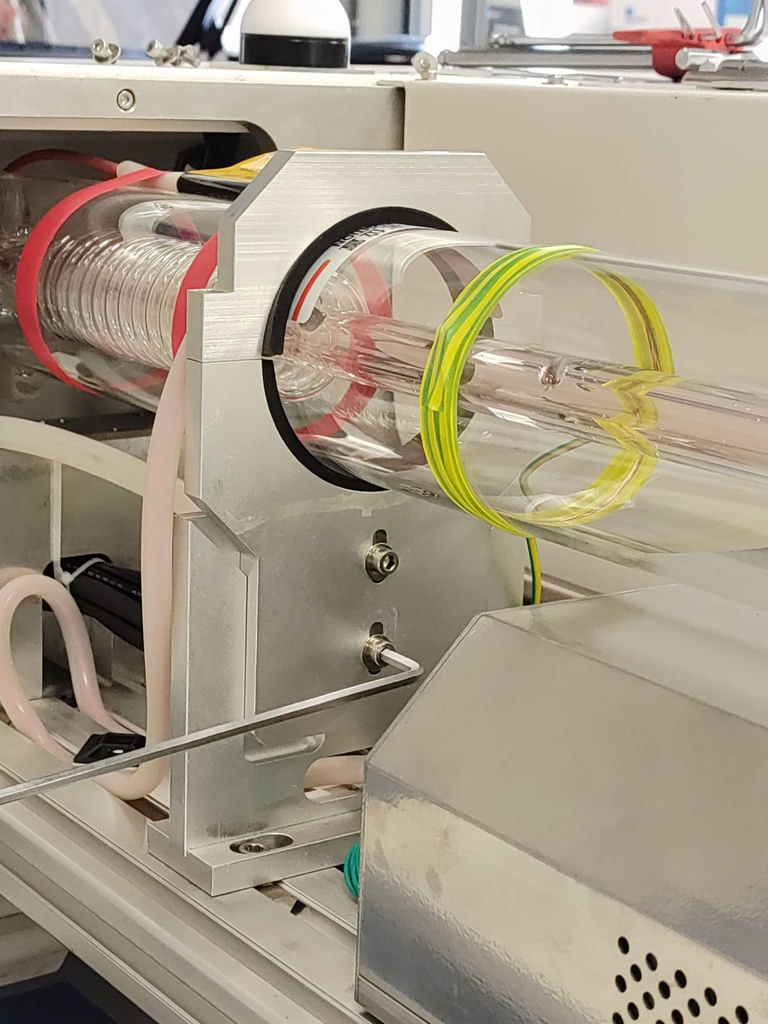
The laser source rests in 2 holders. These holders can be adjusted. Usually, you always adjust on the side furthest away from the mirrors. If you adjust on the side closest to the mirrors, a small adjustment can make too much difference, making it more difficult to adjust precisely.
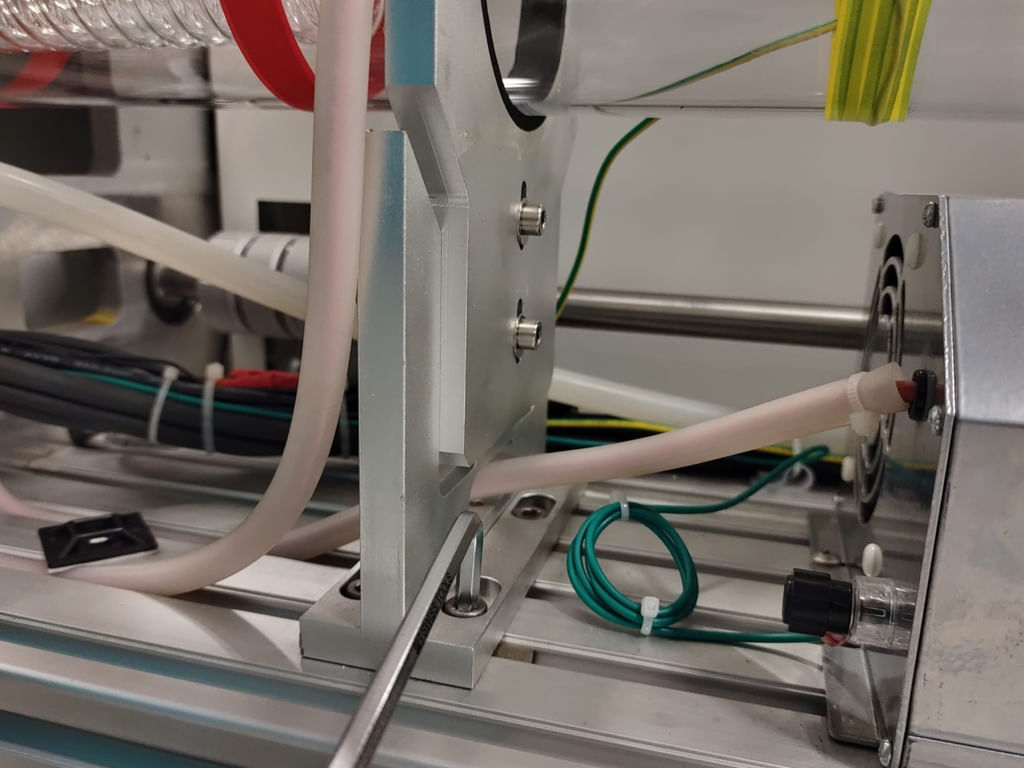
While adjusting the height of the laser source, you need to ensure that the holder does not suddenly shoot down. If that happens, it is difficult to find the right height again. So support the holder properly when adjusting the height!
If you adjust the height of the laser source, the laser beam on the working field goes left or right.
If you adjust the laser source to the left or right, the laser beam goes forwards or backwards.
Adjust the source slightly and repeat the test at the laser head. Do this until the pulse is well centered on the 'plus'. If it is, check the entire mirror alignment again to make sure everything is still properly aligned.