The BRM 90130-X can cut metal and non-metals. In the text below, you will find more information about differences in nozzles, lenses and lens positions.
Nozzles
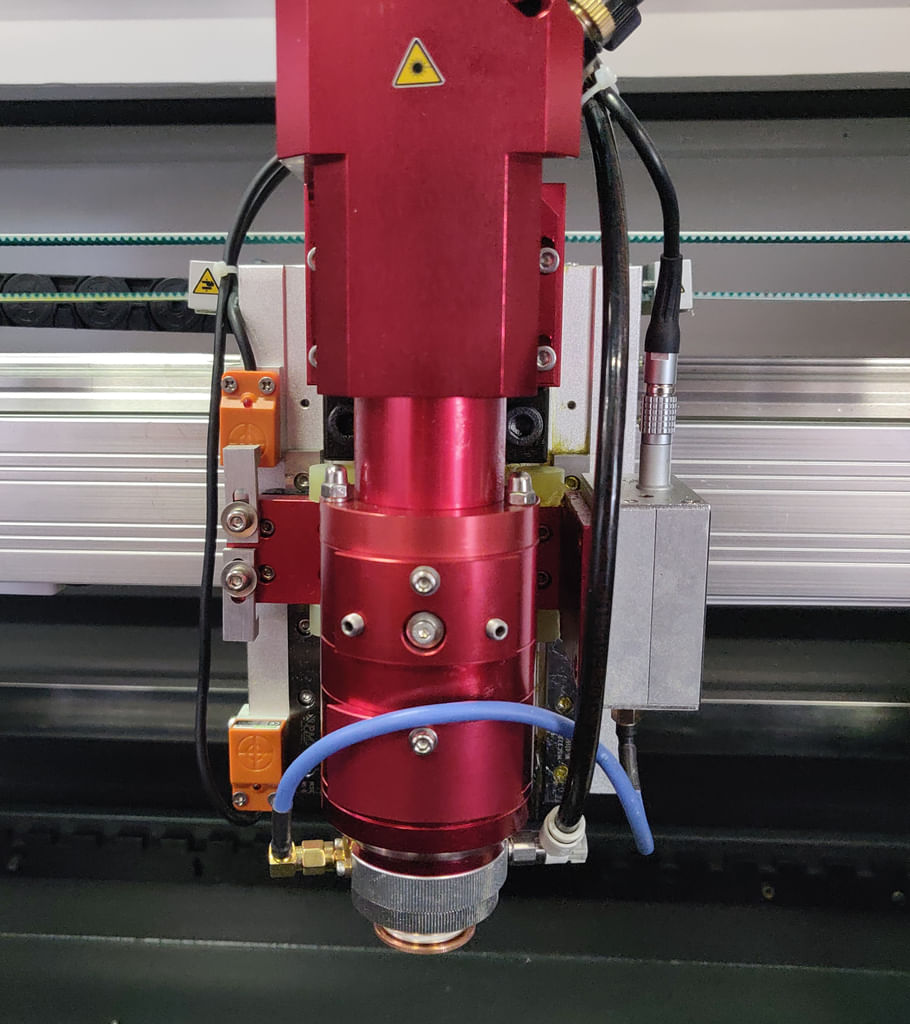
The machine came with three different nozzles.
-
The first one is the 1.5 mm nozzle. This means that the diameter of the hole in the nozzle is 1.5 mm. It is used to cut metals and ensures that little oxygen passes through it. This results in a nice clear, thin line. Because it is a small opening, it requires a perfect mirror and lens alignment, as the laser beam must be able to pass through the opening exactly. It is impossible to use this nozzle for non-metals.
-
The second one is the 2 mm nozzle. This means that the diameter of the hole in the nozzle is 2 mm. It is also used to cut metals. This nozzle allows more oxygen to pass through than the 1.5 mm nozzle. This results in a clean cutting line that is just a bit coarser than when using the 1.5 mm nozzle. But it is a bit easier to align the mirrors and lens because the beam can pass through a slightly larger opening. It is impossible to use this nozzle for non-metals.
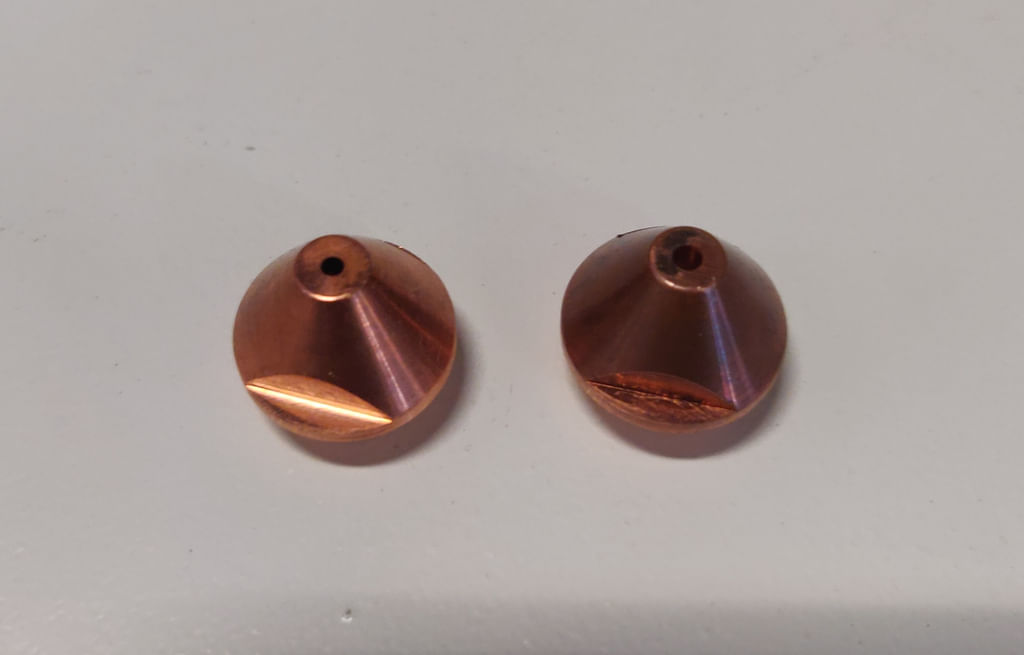
Left: 1.5 mm nozzle. Right: 2 mm nozzle
- The third one is the 3 mm nozzle. It is used solely to cut non-ferrous materials such as acrylic and wood. It resembles a UFO, a point with a larger disc around it. It is impossible to use this nozzle for metals.
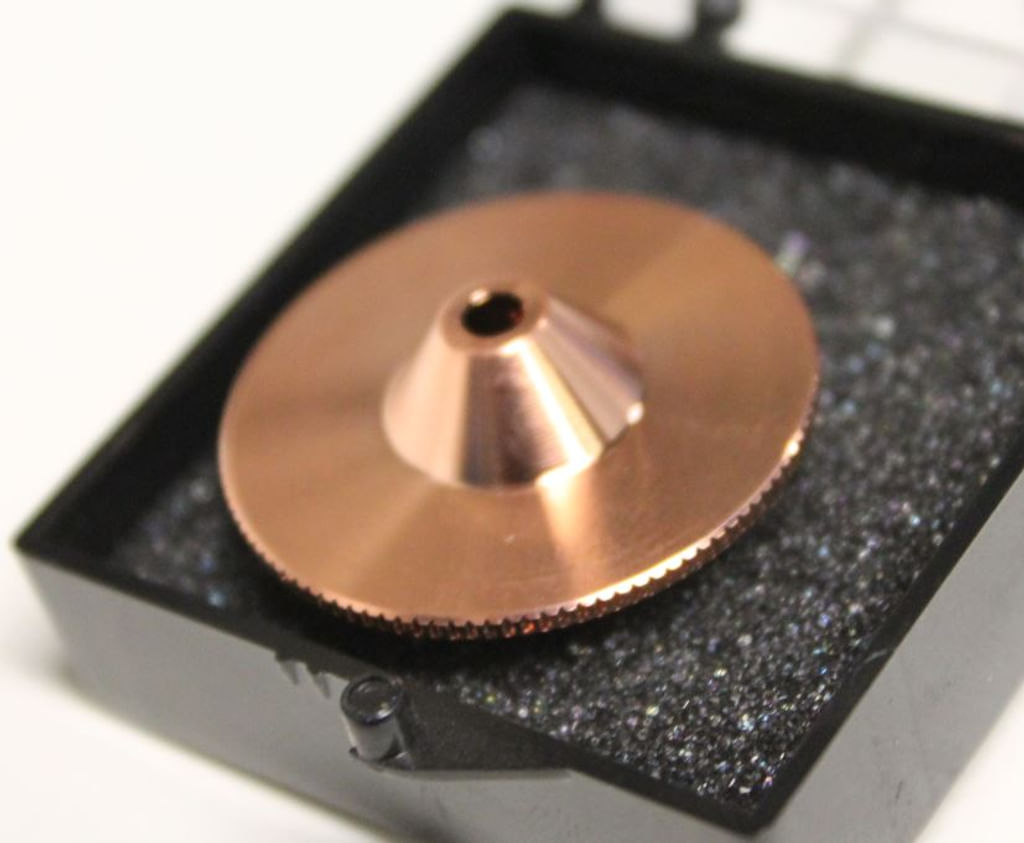
3 mm nozzle
Lenses
Not only do you use a different nozzle, but you also use a different lens and lens holder depending on the material to be processed.
The lens used to cut metal is the 63.8 mm lens with a diameter of 25 mm. This means that the lens holder has a larger opening.The lens to cut non-metals is the 101.6 mm lens with a diameter of 20 mm. This lens is placed in a lens holder with a somewhat smaller opening. Cutting with a 63.5 mm (Ø 20 mm) lens is also possible, but not common.
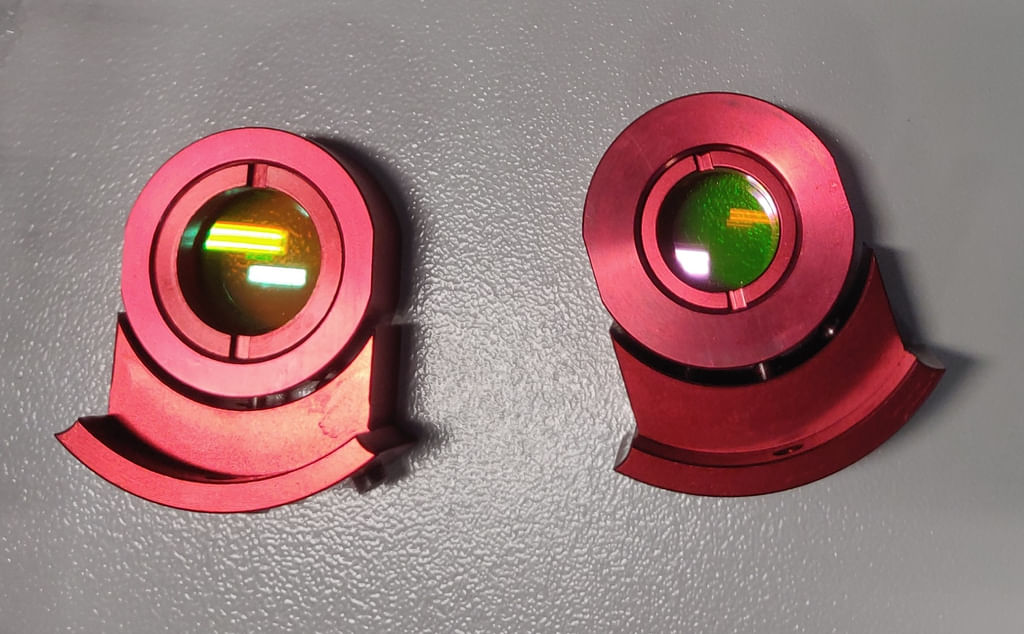
Left: lens holder for metal. Right: lens holder for non-metal
The lens holder is inserted into the laser head. There are two openings in the laser head. One for the lens holder, the other for an empty holder. The empty holder is needed to prevent oxygen from escaping. If oxygen escapes, the cutting line will become imperfect. In addition, the empty holder ensures that no smoke or dust can get onto the lens.
The lens used to cut metal is placed in the lens holder with the larger opening. The entire lens holder is placed in the lower opening. Insert the empty holder into the upper opening. Position the appropriate nozzle on the laser head; the 1.5 mm nozzle or the 2 mm nozzle. Do not over-tighten the nozzle. Fixed is fixed.
Metal lens holder in the bottom position.
If you are going to cut non-metal, place the 101.6 mm lens in the lens holder with the smaller opening. The lens holder is placed in the upper opening. Place the empty holder in the lower opening. Position the correct nozzle on the laser head, the 3 mm nozzle, with the UFO-shape. Do not over-tighten the nozzle. Fixed is fixed.
Non-metal lens holder in the upper position
When using the 63.5 mm lens (Ø 20 mm) for cutting non-metals, it is placed in the lens holder with the smaller opening. The lens holder is placed in the lower position. Position the empty holder in the upper position.
Switch on the machine. Make sure that the Metal-Acrylic switch is on Metal. This switch is located on the right side of the machine on the BRM Original. Place the holder with the metal lens and attach the 1.5 mm or 2 mm nozzle.
Press 'Follow Adjust'. This button is located on the right side of the machine. Follow Adjust provides the correct focus height so the cutting line will be optimal. Open the oxygen from the cylinder. You are now ready to cut metal.
Make sure to only cut stainless steel or steel with a maximum thickness of 1.2 mm. It is impossible to cut copper, aluminum, zinc, etc.
If the cutting line is not clean or looks like welding, this means that the cutting parameters are not optimal. Adjust the speed, power and/or oxygen.
It is impossible to engrave while in metal mode.
Switch on the machine. Make sure that the Metal-Acrylic switch is set to Acrylic. This switch is located on the right side of the machine on the BRM Original. Place the holder with the acrylic lens and attach the 3 mm nozzle, with the UFO-shape. Set the correct focus height. This is done by moving the table up / down. Be very careful here, there is a chance of a collision with the laser head. This can cause enormous damage. When working in acrylic mode, you do not need oxygen.
It is possible to engrave acrylic, wood and metal when working in acrylic mode. When marking metal, it is important to use a laser spray such as CerMark. This ensures that there is no reflection towards the laser source. Any reflection towards the laser source can cause it to break. If you do mark metals without a laser spray and the laser source is damaged, this is not covered by warranty!Also, by applying a spray such as CerMark, you will get a nice contrasting engraving.
What metals can I cut with my BRM90130-X or BRM Budget90130-X?